
LLC-144 Setup Instructions
1. Install Terminals:
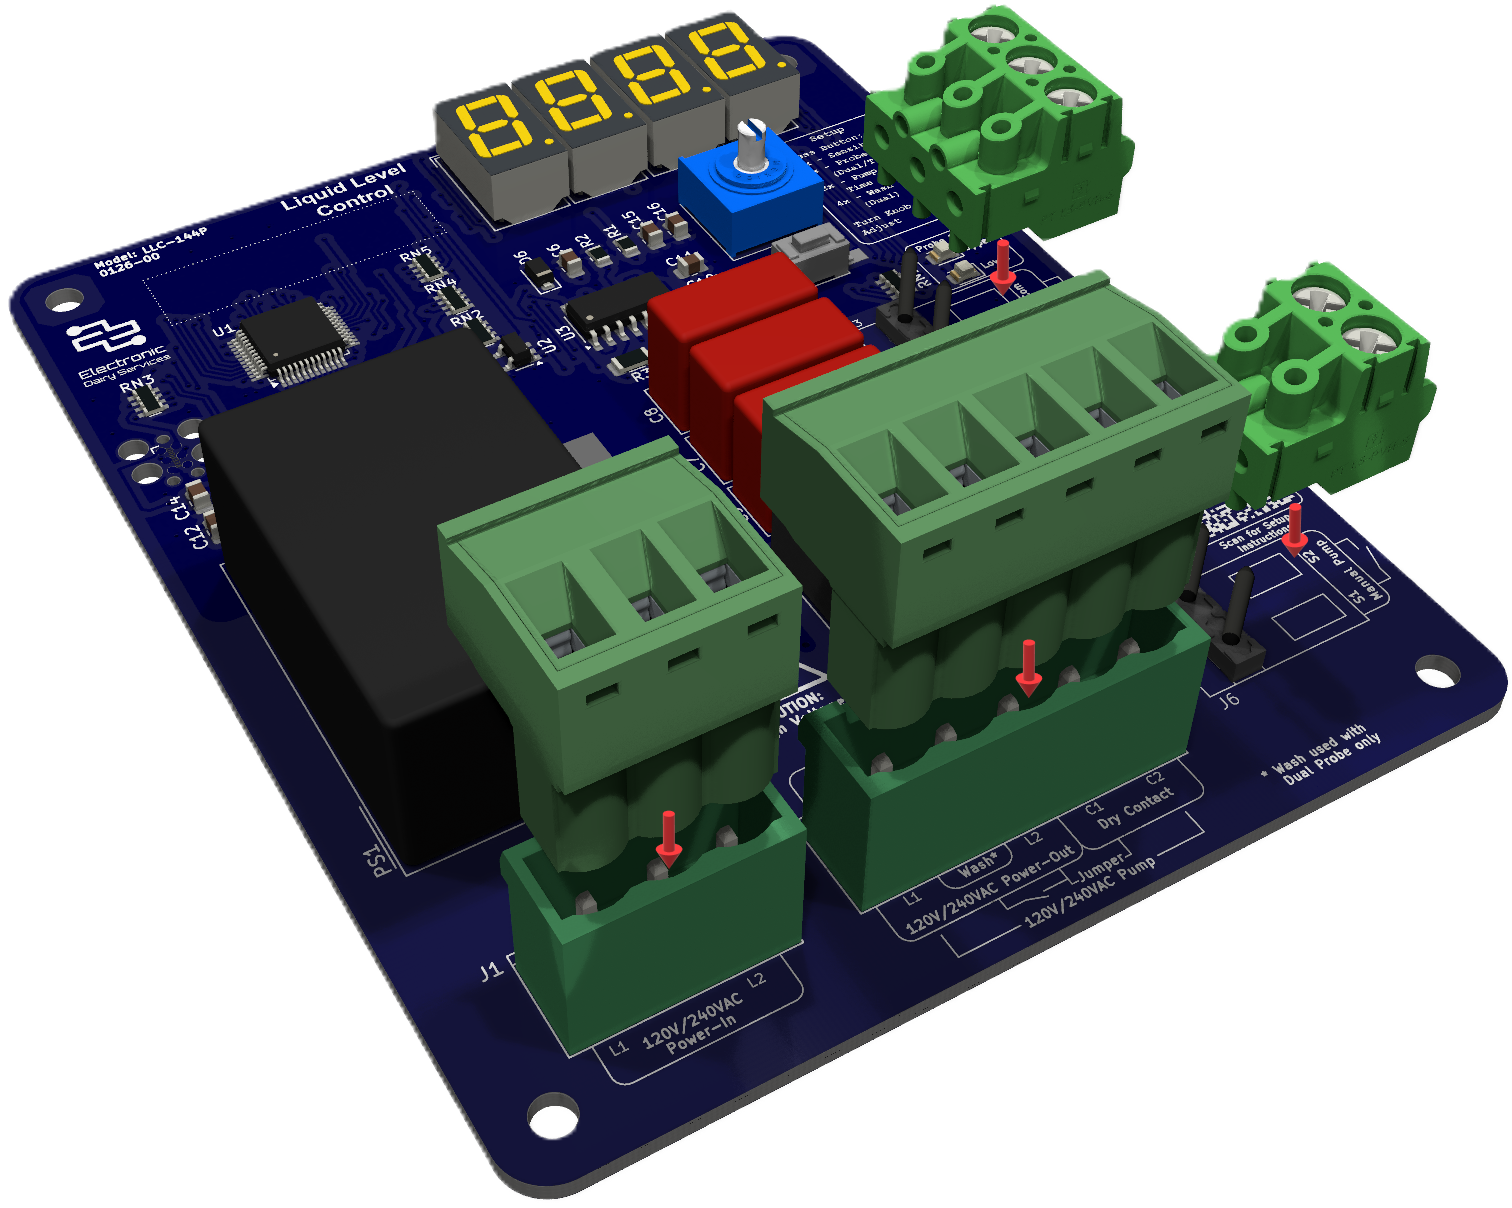
Press terminal block plugs onto pin headers.
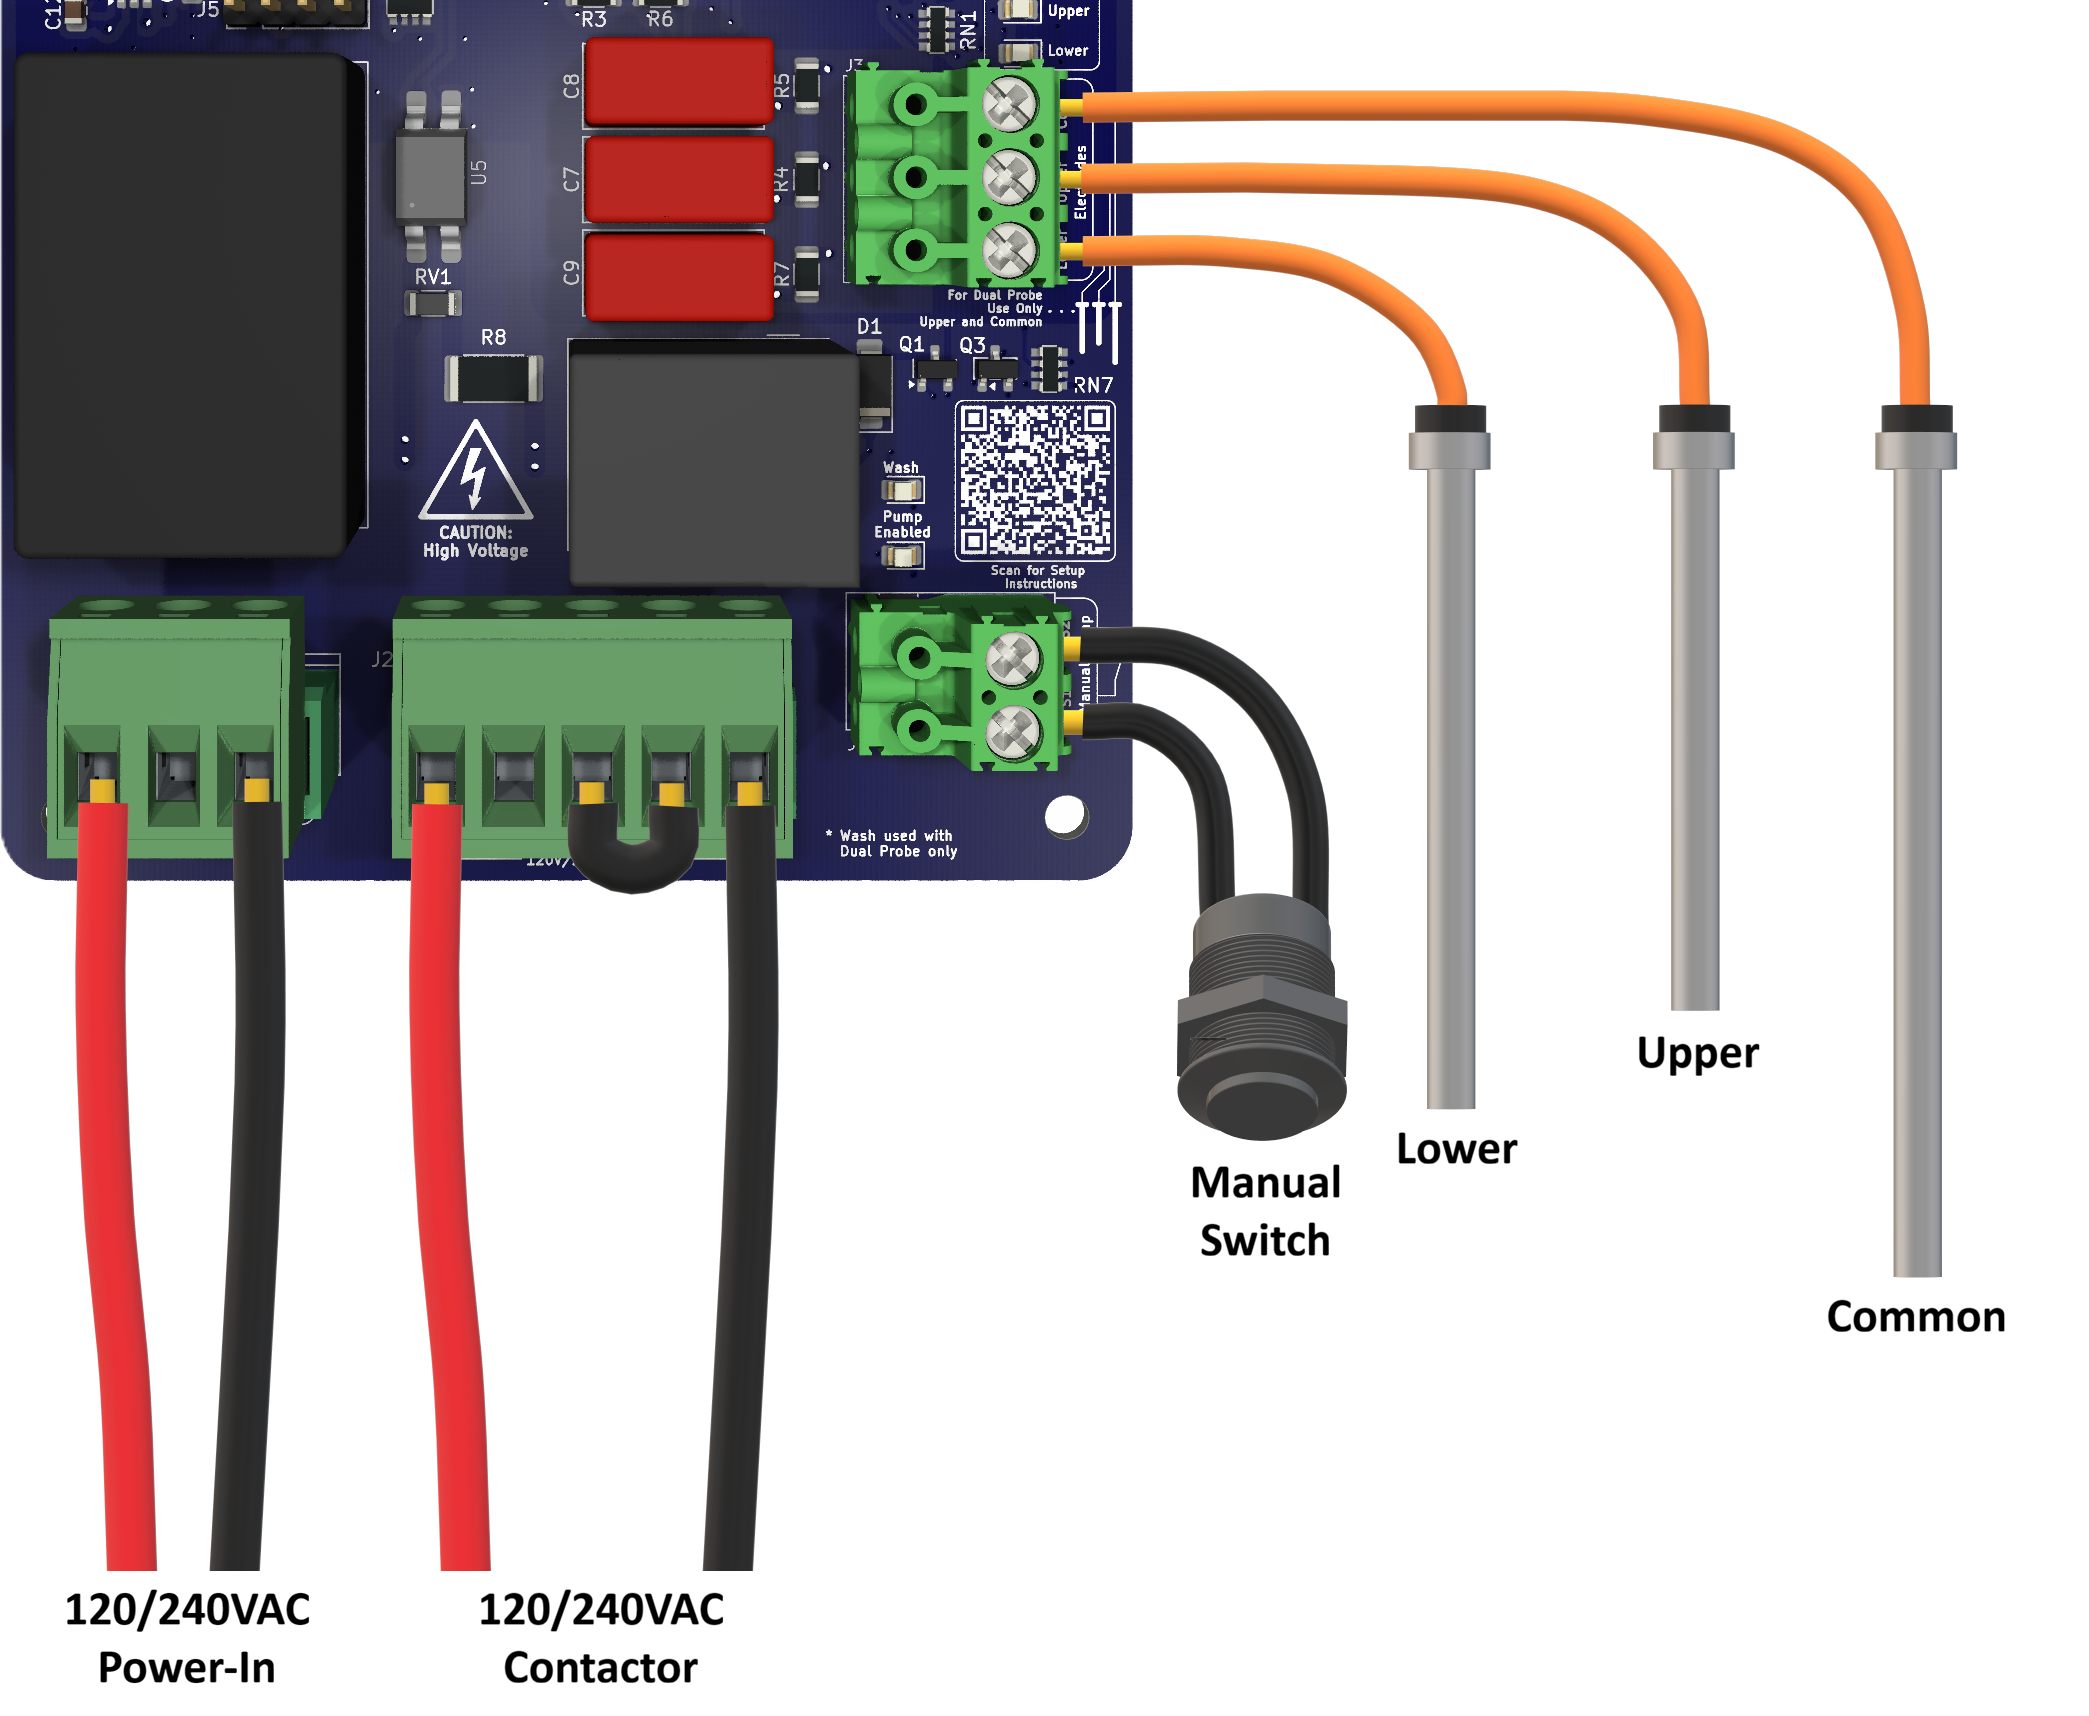
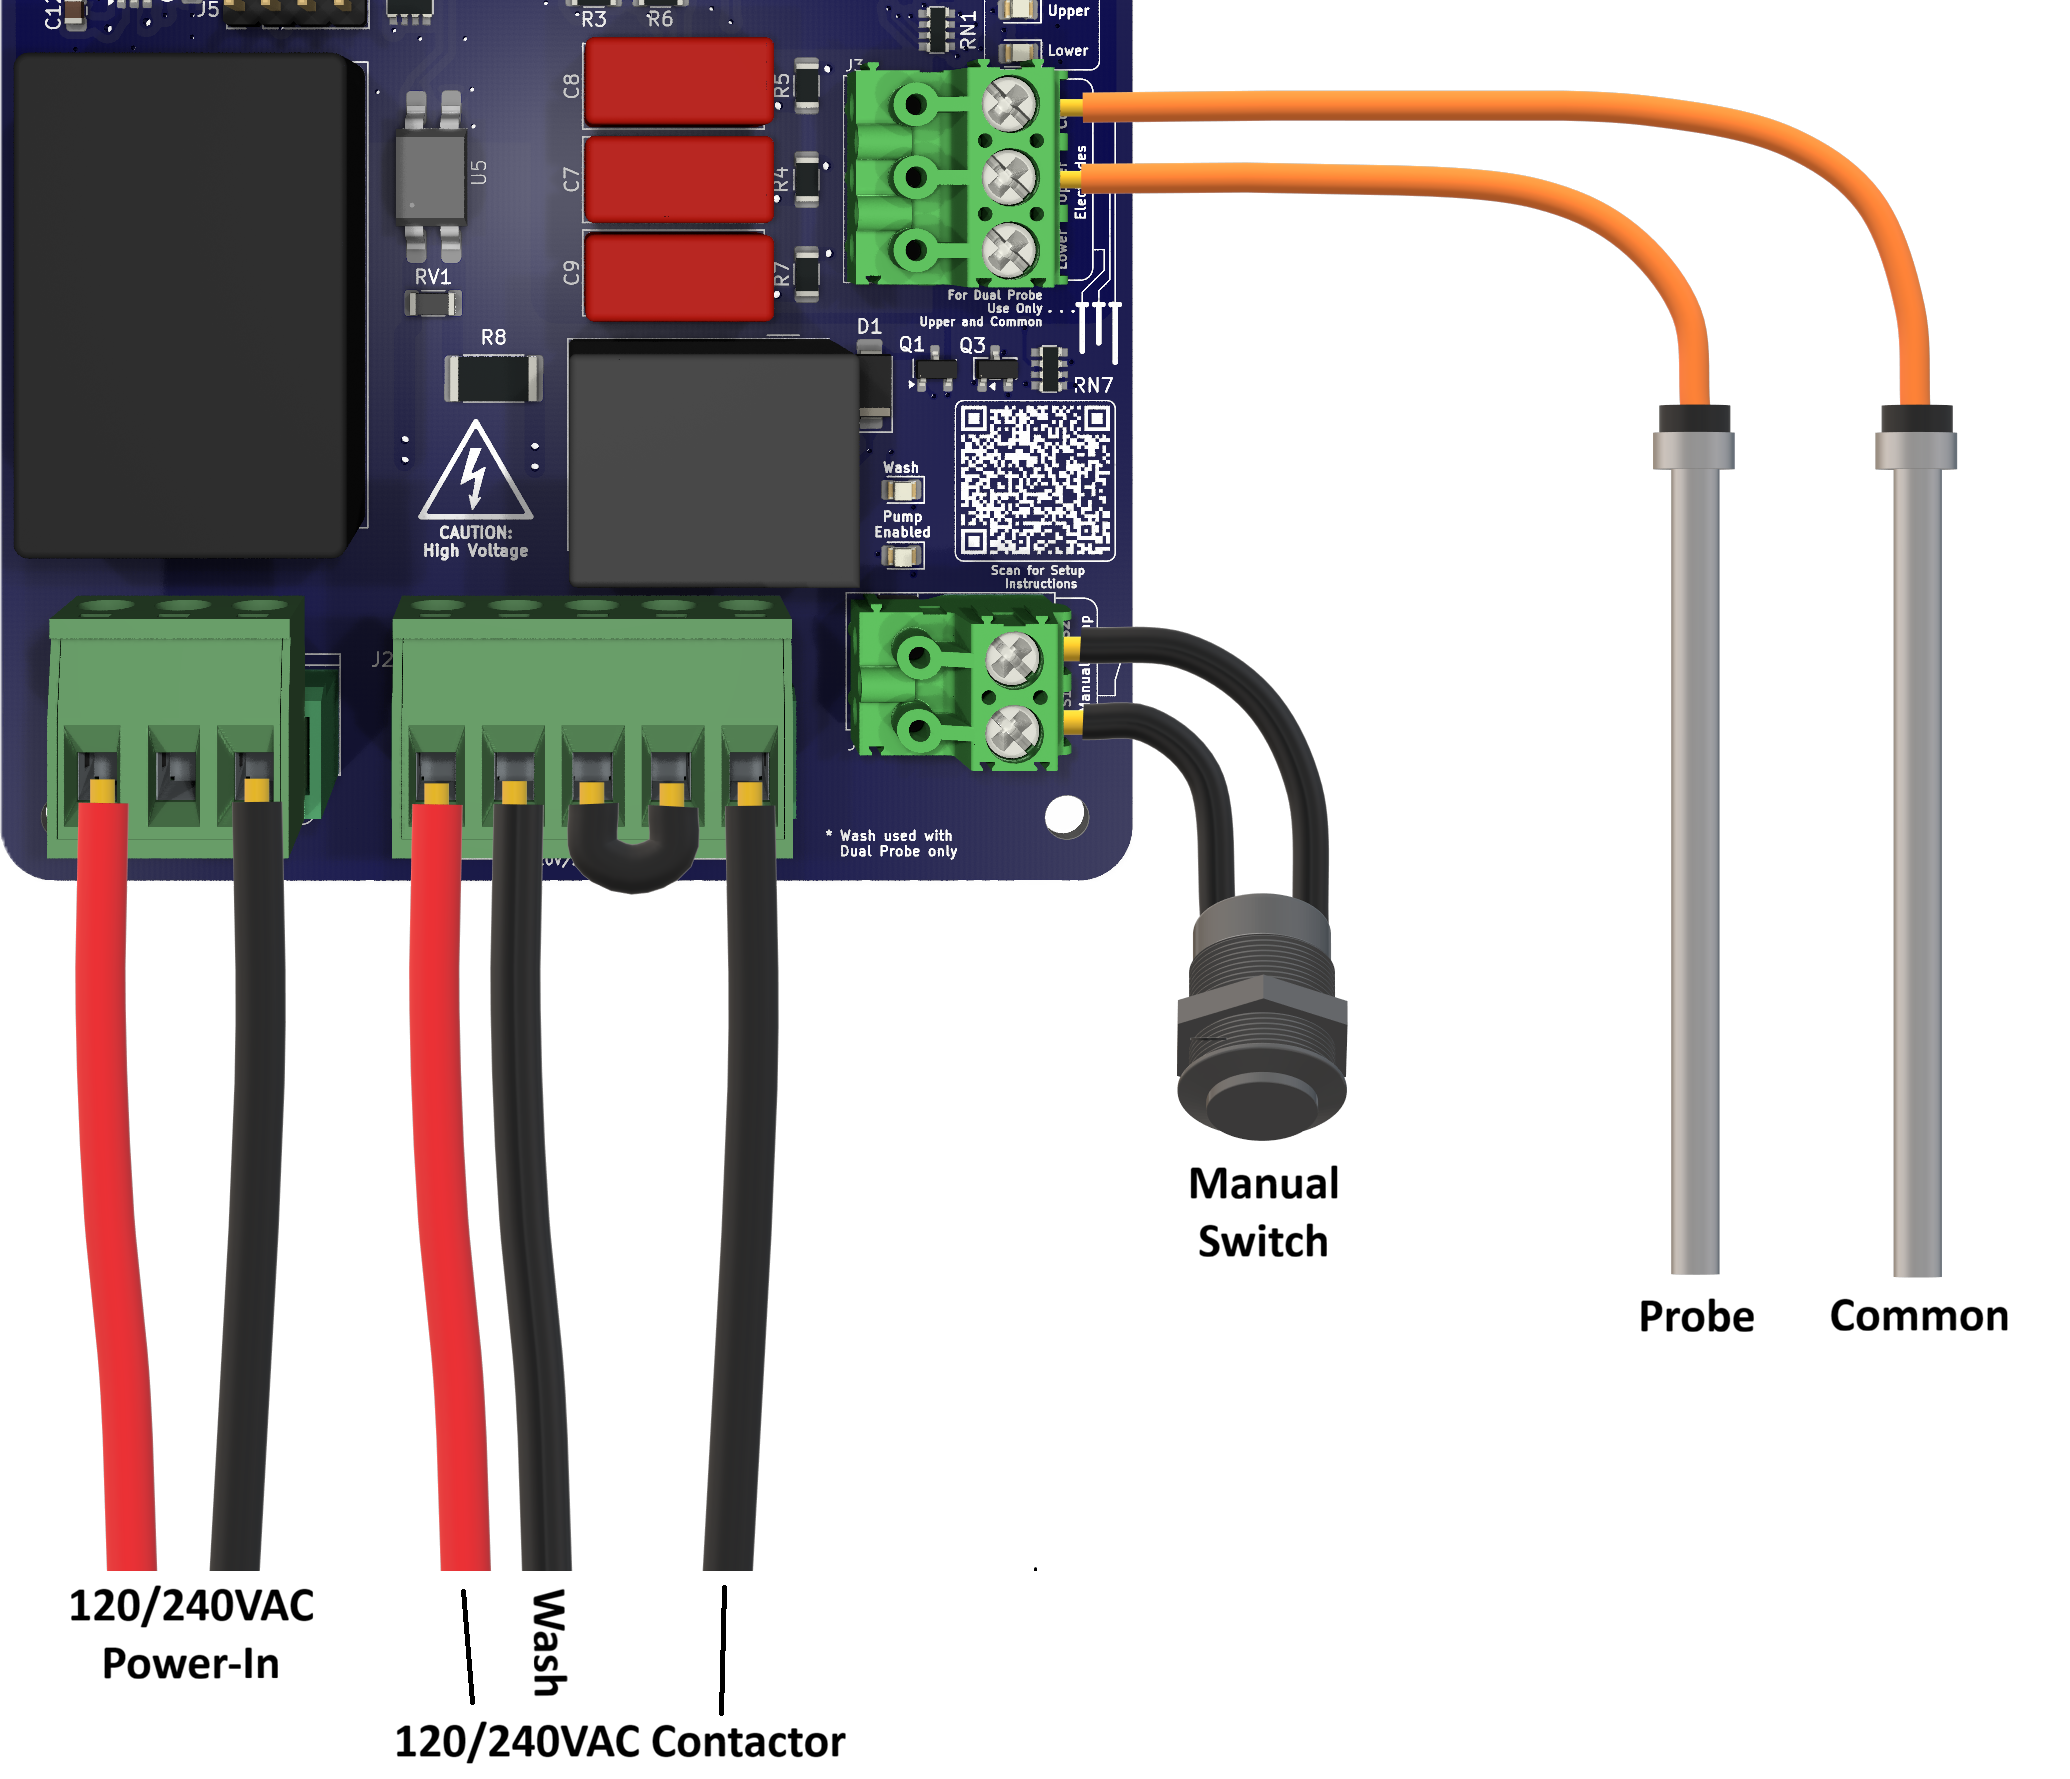
Caution: High Voltage - Disable power before servicing
2. Attach power, contactor and probes:
Triple Probe:
Connect 120/240VAC to pins 1 and 3 of J1
Jump pins 3-4 of J2 and attach contactor to pins 1 and 5
Attach a manual switch between pins of J6
Attach lower probe to bottom pin of J3, upper to middle pin, and common to top pin
Dual Probe:
Connect 120/240VAC to pins 1 and 3 of J1
Jump pins 3-4 of J2 and attach contactor between pins 1 and 5
Attach Wash signal to pin 2 of J2 (switched from pin 3 of J1 or pin 3 of J2)
Attach a manual switch between pins of J6
Attach lower probe to bottom pin of J3, upper to middle pin, and common to top pin
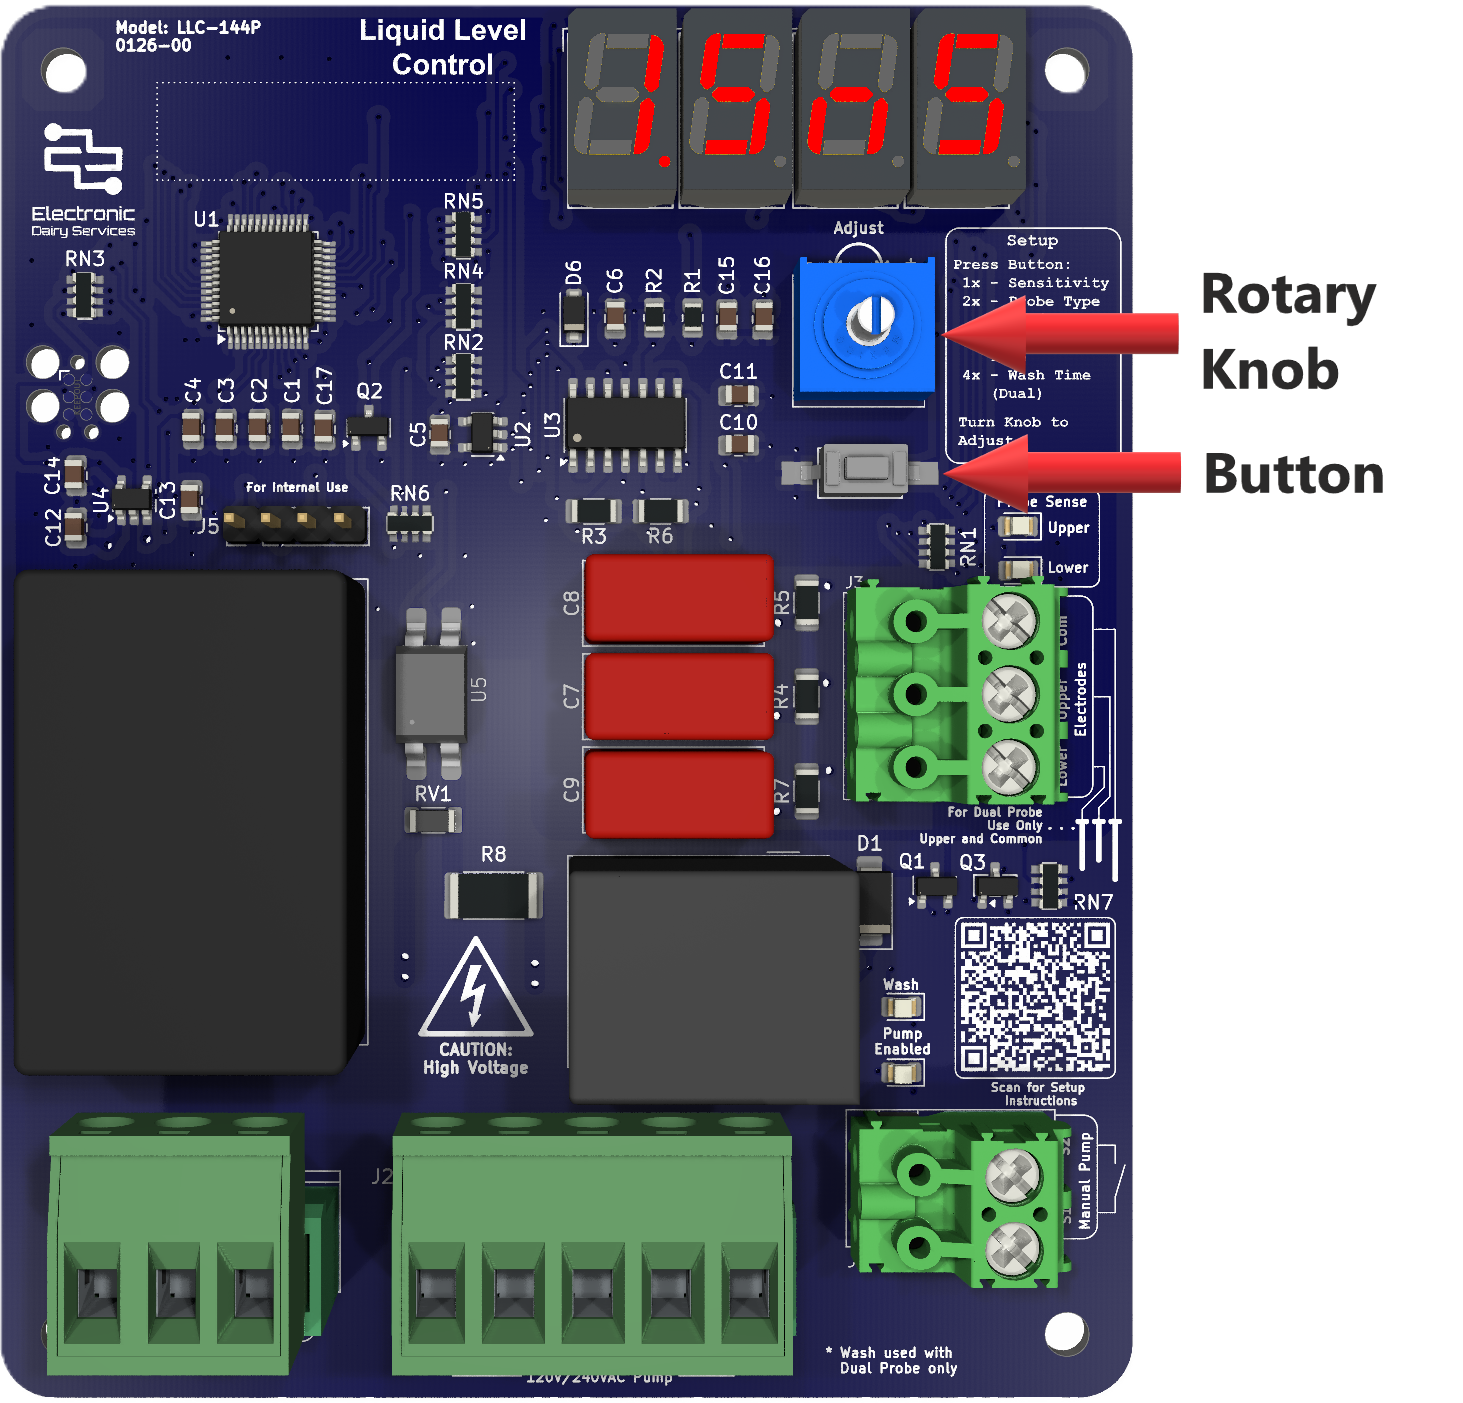
Apply power and configure the LLC-144 using a combination of the button, rotary knob and 7-segment display. Begin by pressing the button:
1x to set the sense value in ohms from 100Ω to 9000Ω
2x to set the probe type as dual or triple
3x to set the pump-down-time in seconds from 0s or 1s to 5.0s
4x to set the wash-time in seconds from pump-down-time to 20.0s (Dual probe type only)
Turn the setup knob to adjust each value
3. Configure Settings:
See the manual for more detailed information