
OVC-200 Setup Instructions
The OVC-200 is designed to work identically to a GEA® Touchstone/Omni board* with the added benefit of a display for quick configuration and a network expansion port for future wireless configuration.
*Legacy Optic Sensing not supported
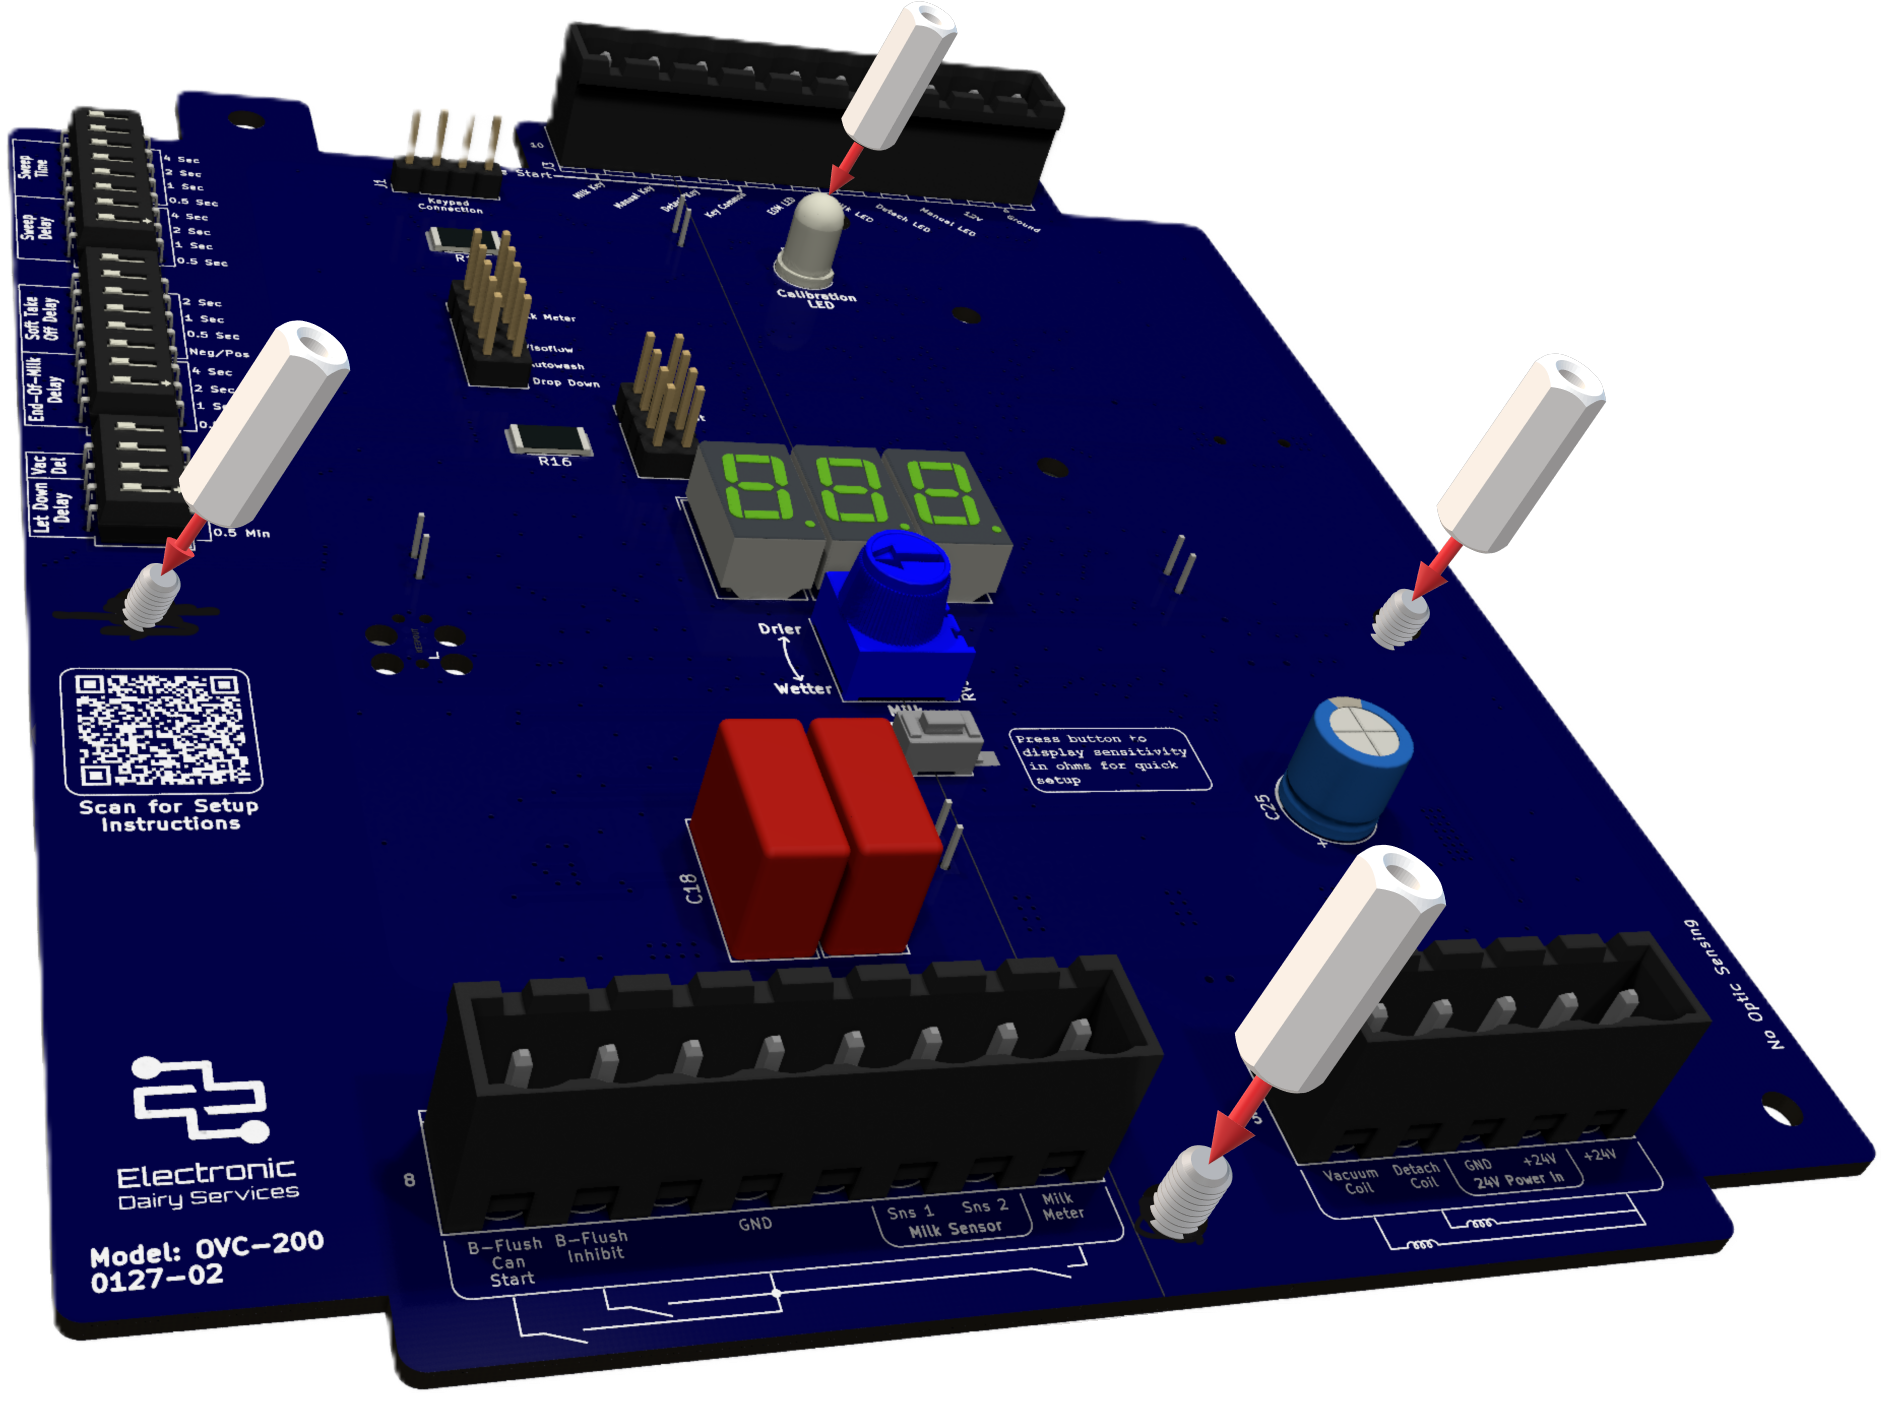
1. Mounting:
Mount the OVC-200 in an enclosure for a GEA® Touchstone/Omni using the 4x provided thumb screws and install the terminal blocks (not provided)
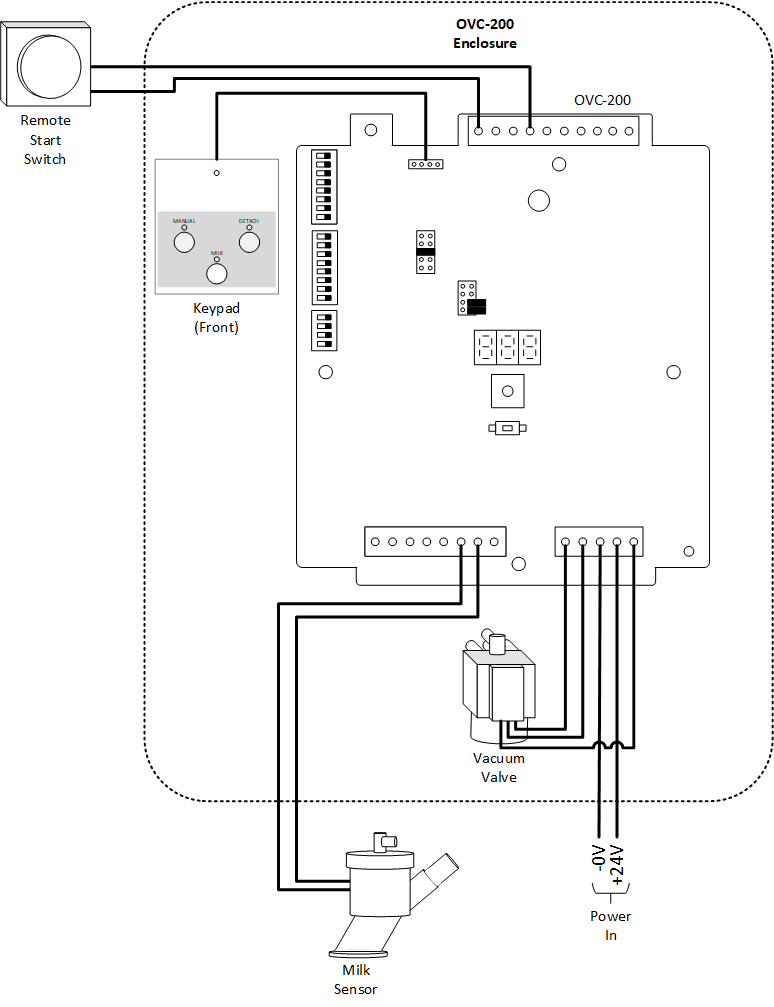
2. Attach power and connections:
The figure shows a common configuration. Note that other configurations may be used.
Connect the keypad to J1
Attach 24V DC to Terminal J4 pins 2-3
Attach the Milk Sensor to Terminal J2 pins 2-3
Attach the Detach and Vacuum Shut-Off Valve to Terminal J1 pins 1, 4 and 5
Attach the Remote Start Switch (if used) to terminal J3 pins 7-10
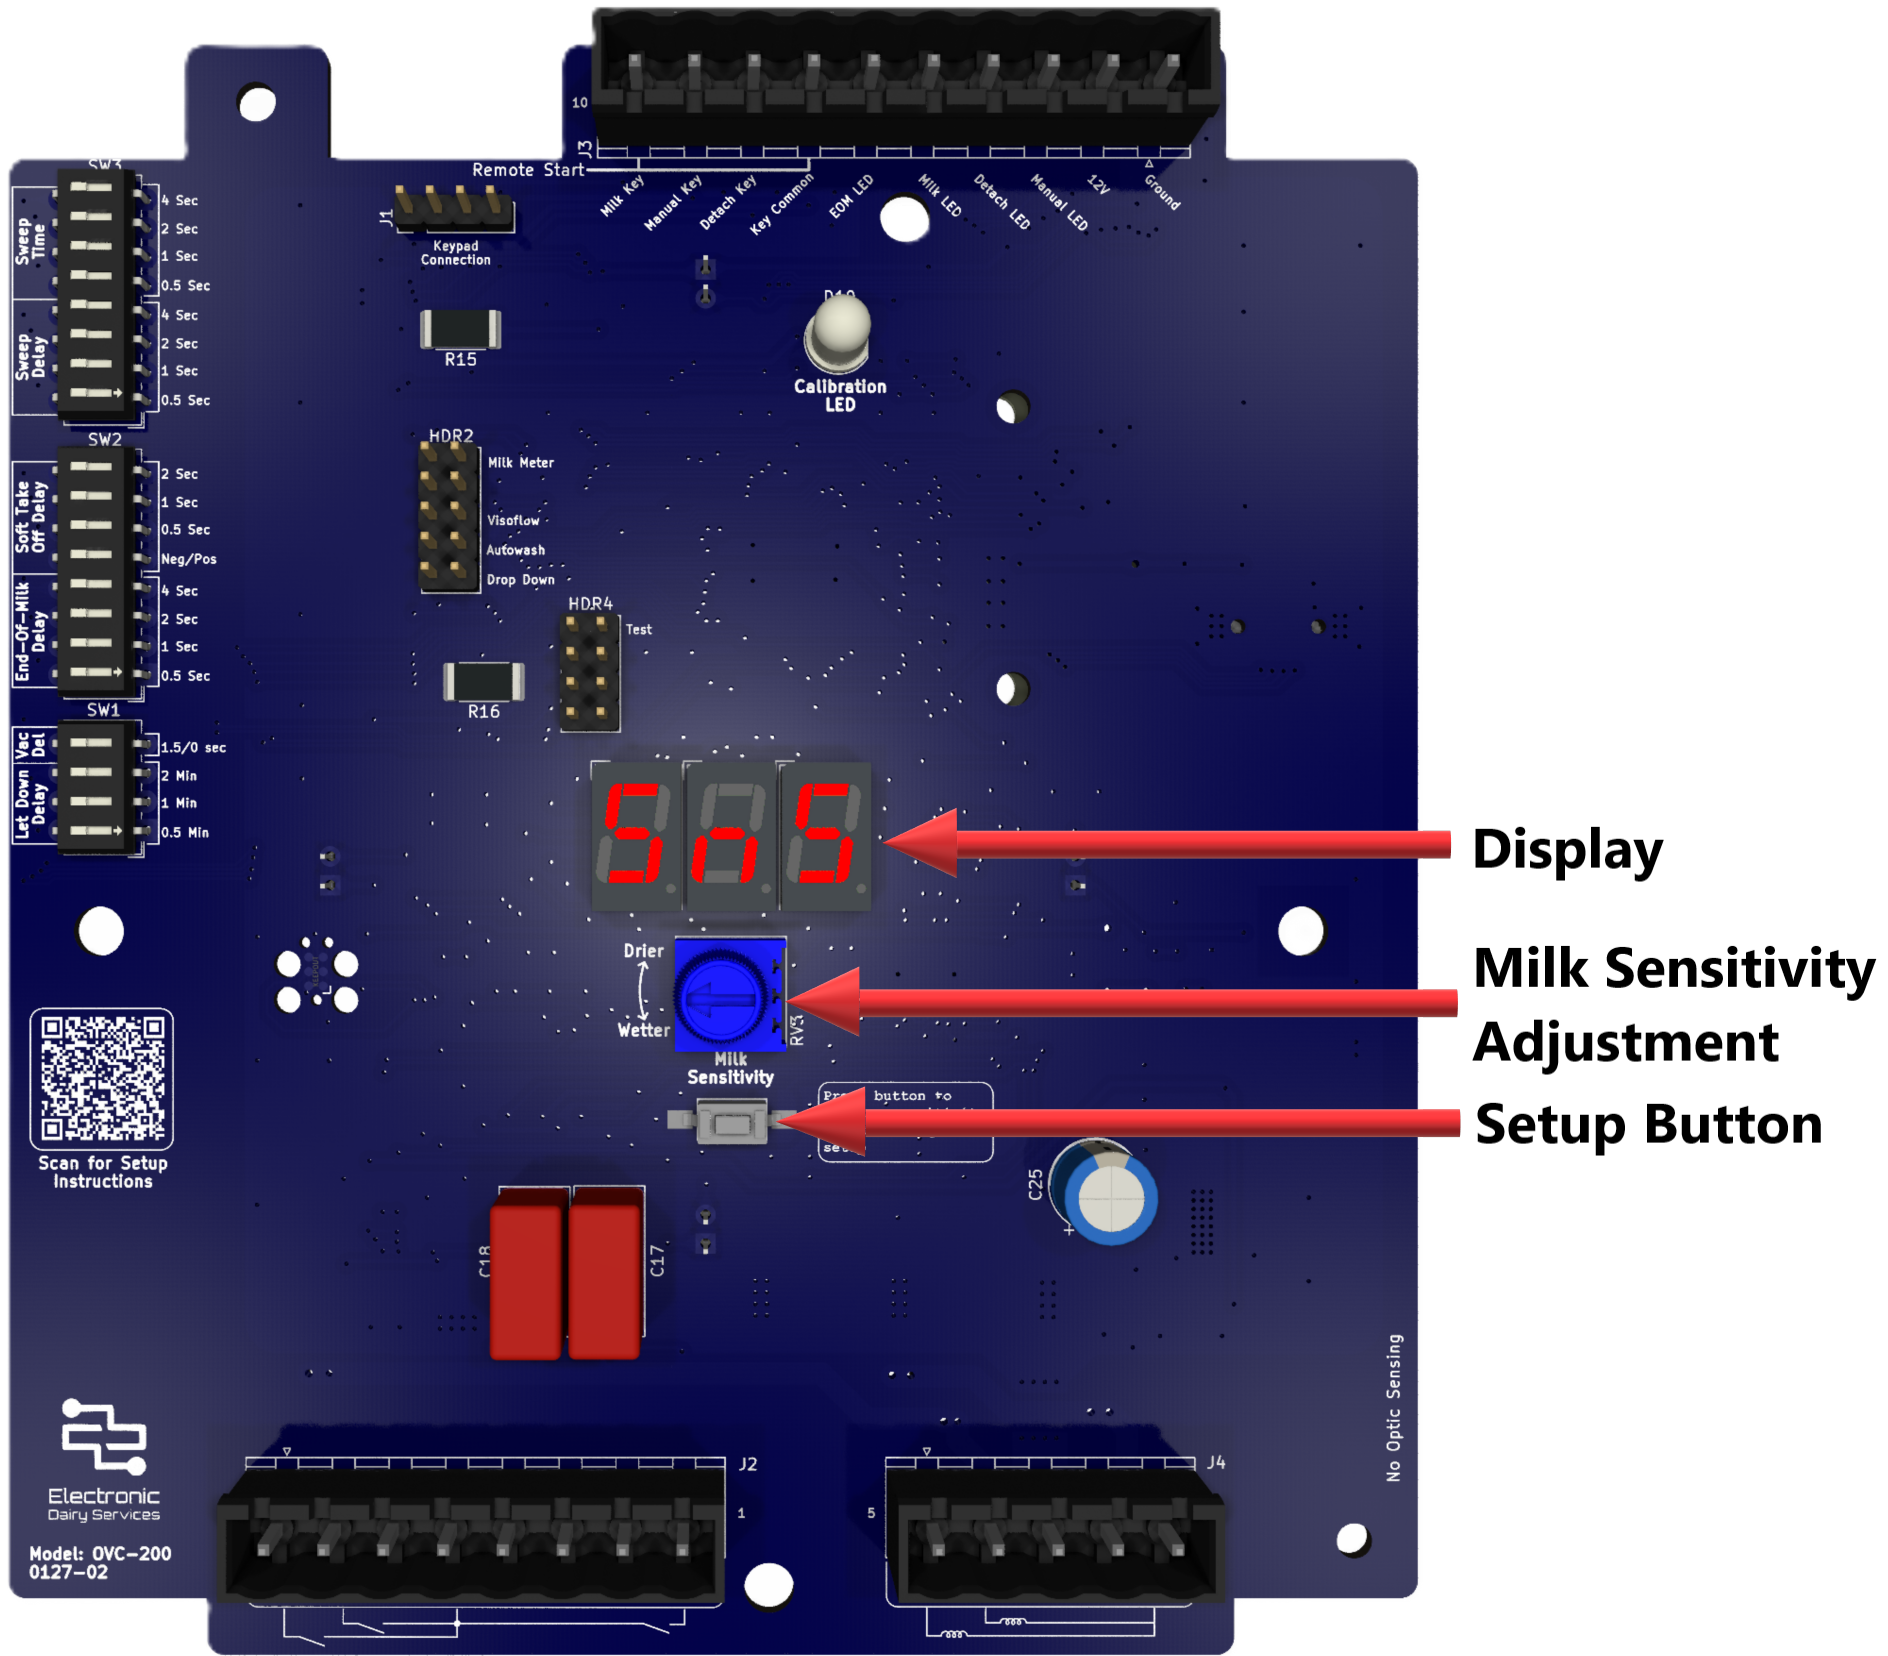
3. Configure Milk Sensitivity:
The milk sensitivity is adjusted with a potentiometer in the same way as the GEA® Touchstone/Omni. However, the OVC-200 also provides a display that eliminates the need for an external potentiometer in setting resistance.
Press the “Setup” button. The set resistance should now be displayed in ohms
Adjust the potentiometer to the desired resistance
Done!
4. Configure DIP switches and jumpers
The DIP switches and jumpers are set in the same way as a GEA® Touchstone/Omni board with an added benefit that the display will show the set value of the DIP switches in seconds or minutes when change occurs. In most cases the “Visoflow” jumper should be set on HDR2.
See the manual for more detailed information