
ACR-300 Setup Instructions without Potentiometer
Hardware version 1.1 and older (Without potentiometer RV4)
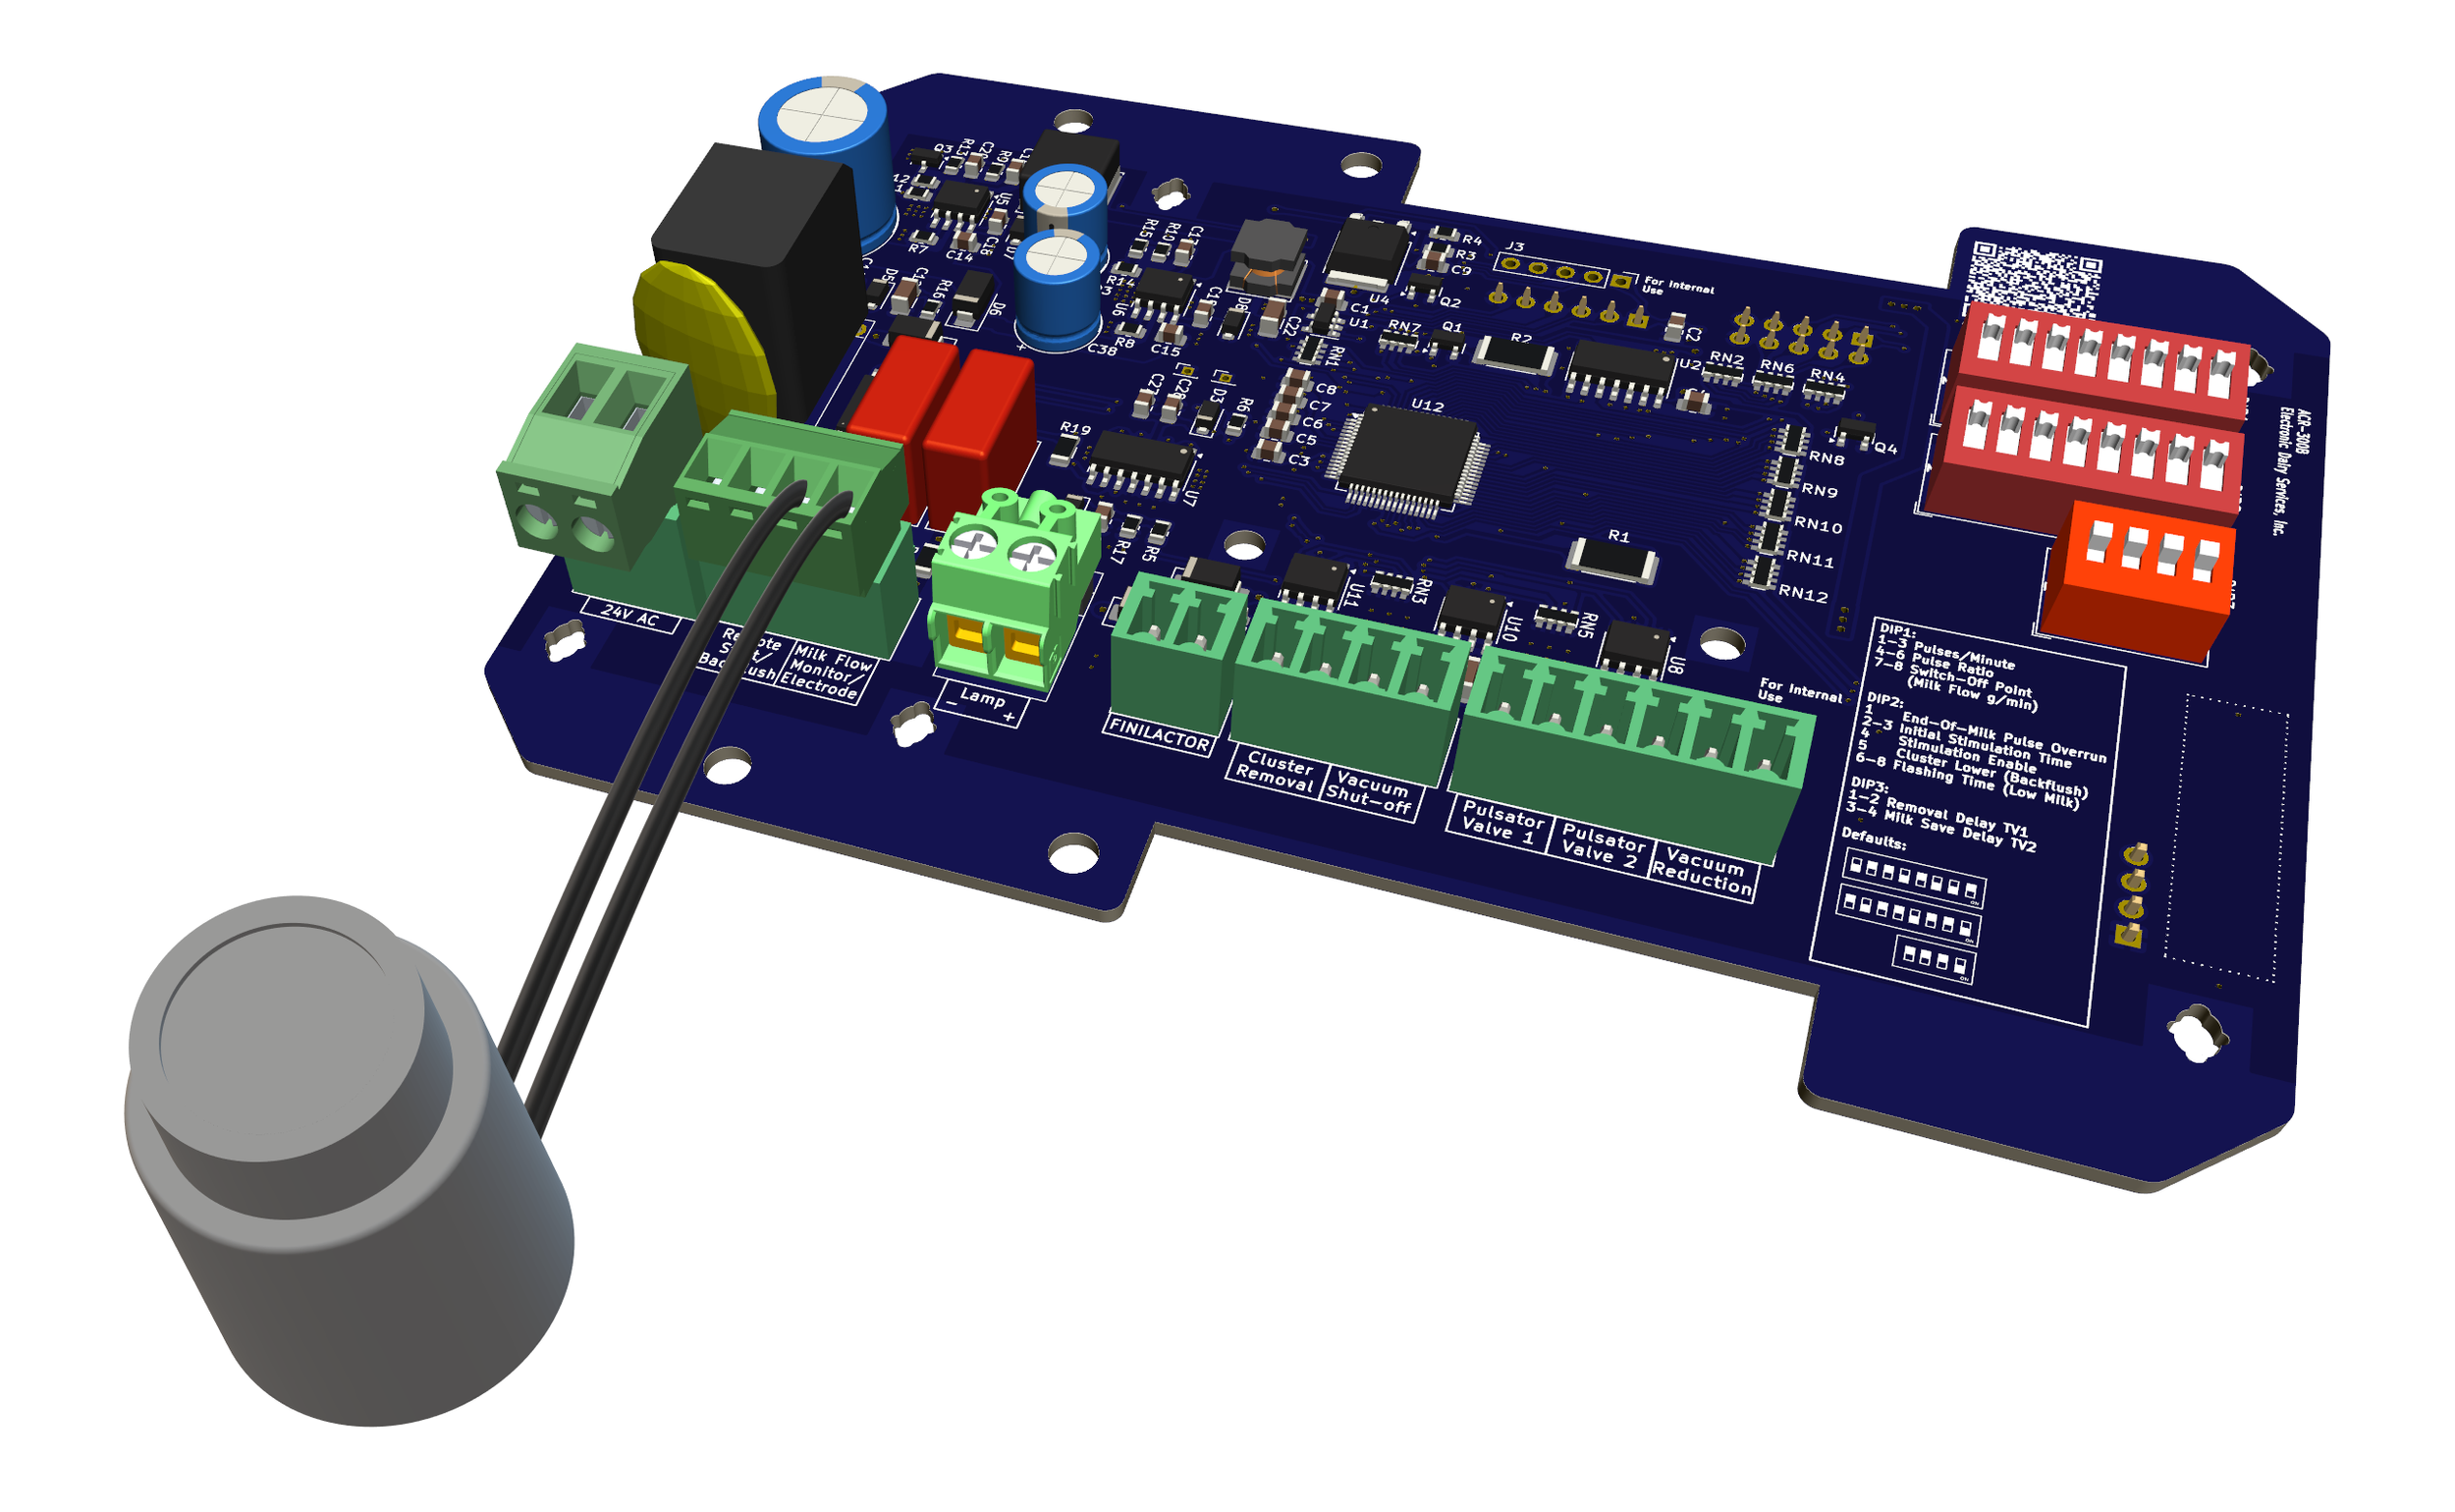
1. Using a test potentiometer, set to the desired resistance, attach its leads between the Milk Flow pins (J9 terminal, pins 3 and 4). Suggested values based upon GEA® Instruction Manual 7053-9001-019 (or STATS II book page 26) are:
VisoFlow: 460Ω (Default)
Legacy: 220Ω
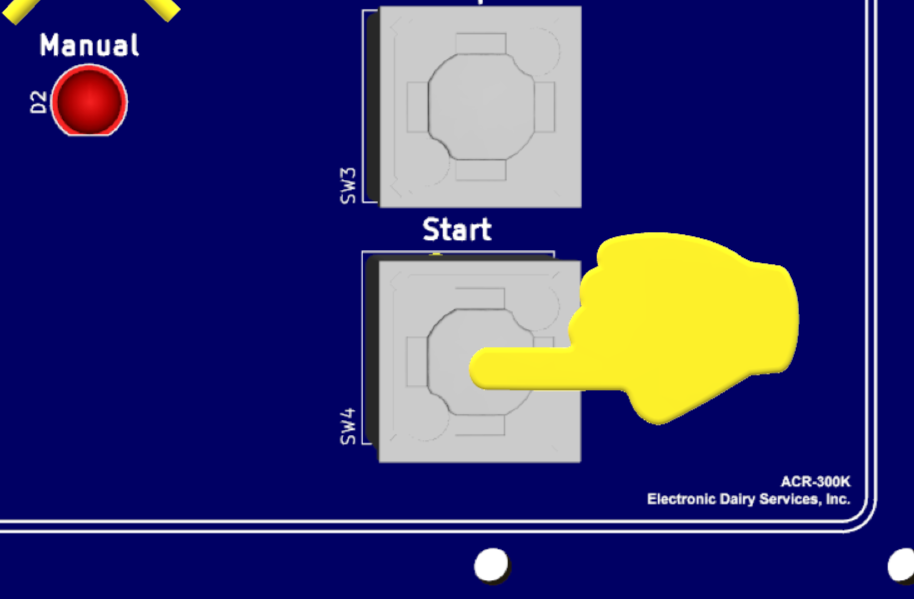
2. Disable Power
3. While holding the “Start” button apply power then release the start key.
4. If all three LED’s are lit, the value is already set and no calibration is needed.

5. If only one LED is lit, press and hold the “C” button until the green light flashes indicating that the new value was accepted. All three LEDs should be on at this time. (Note: If the red LED flashes it indicates the value was out of range or another problem occurred.)
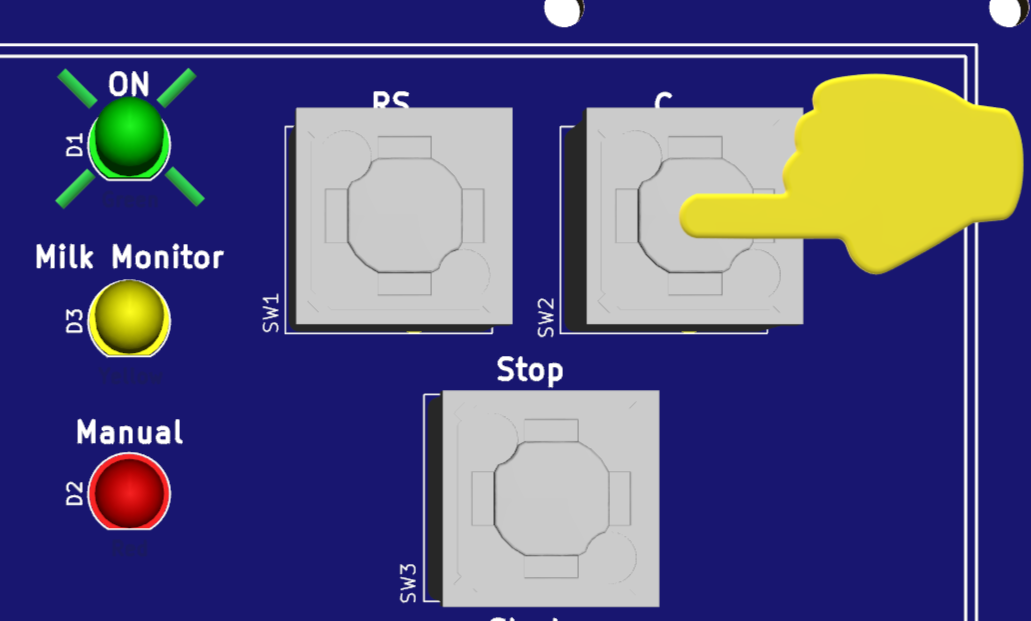
6. Pressing the stop key or cycling the power off and on will release the board from the calibration mode.
7. Calibration procedure completed.