ACR-300 Setup Instructions

The ACR-300 board is designed to operate in the same way as the ACR 3 APEX board from GEA® with a few exceptions. One unique feature of our ACR-300 is that it has a detachable keypad which can be purchased separately. Use the following instructions to install the ACR-300 to a preexisting milking stall. If any changes need to be made to the milking parameters, refer to the GEA® instruction manual 7053-9001-019 for the ACR 3 APEX or the Stats II book pages 25-26.
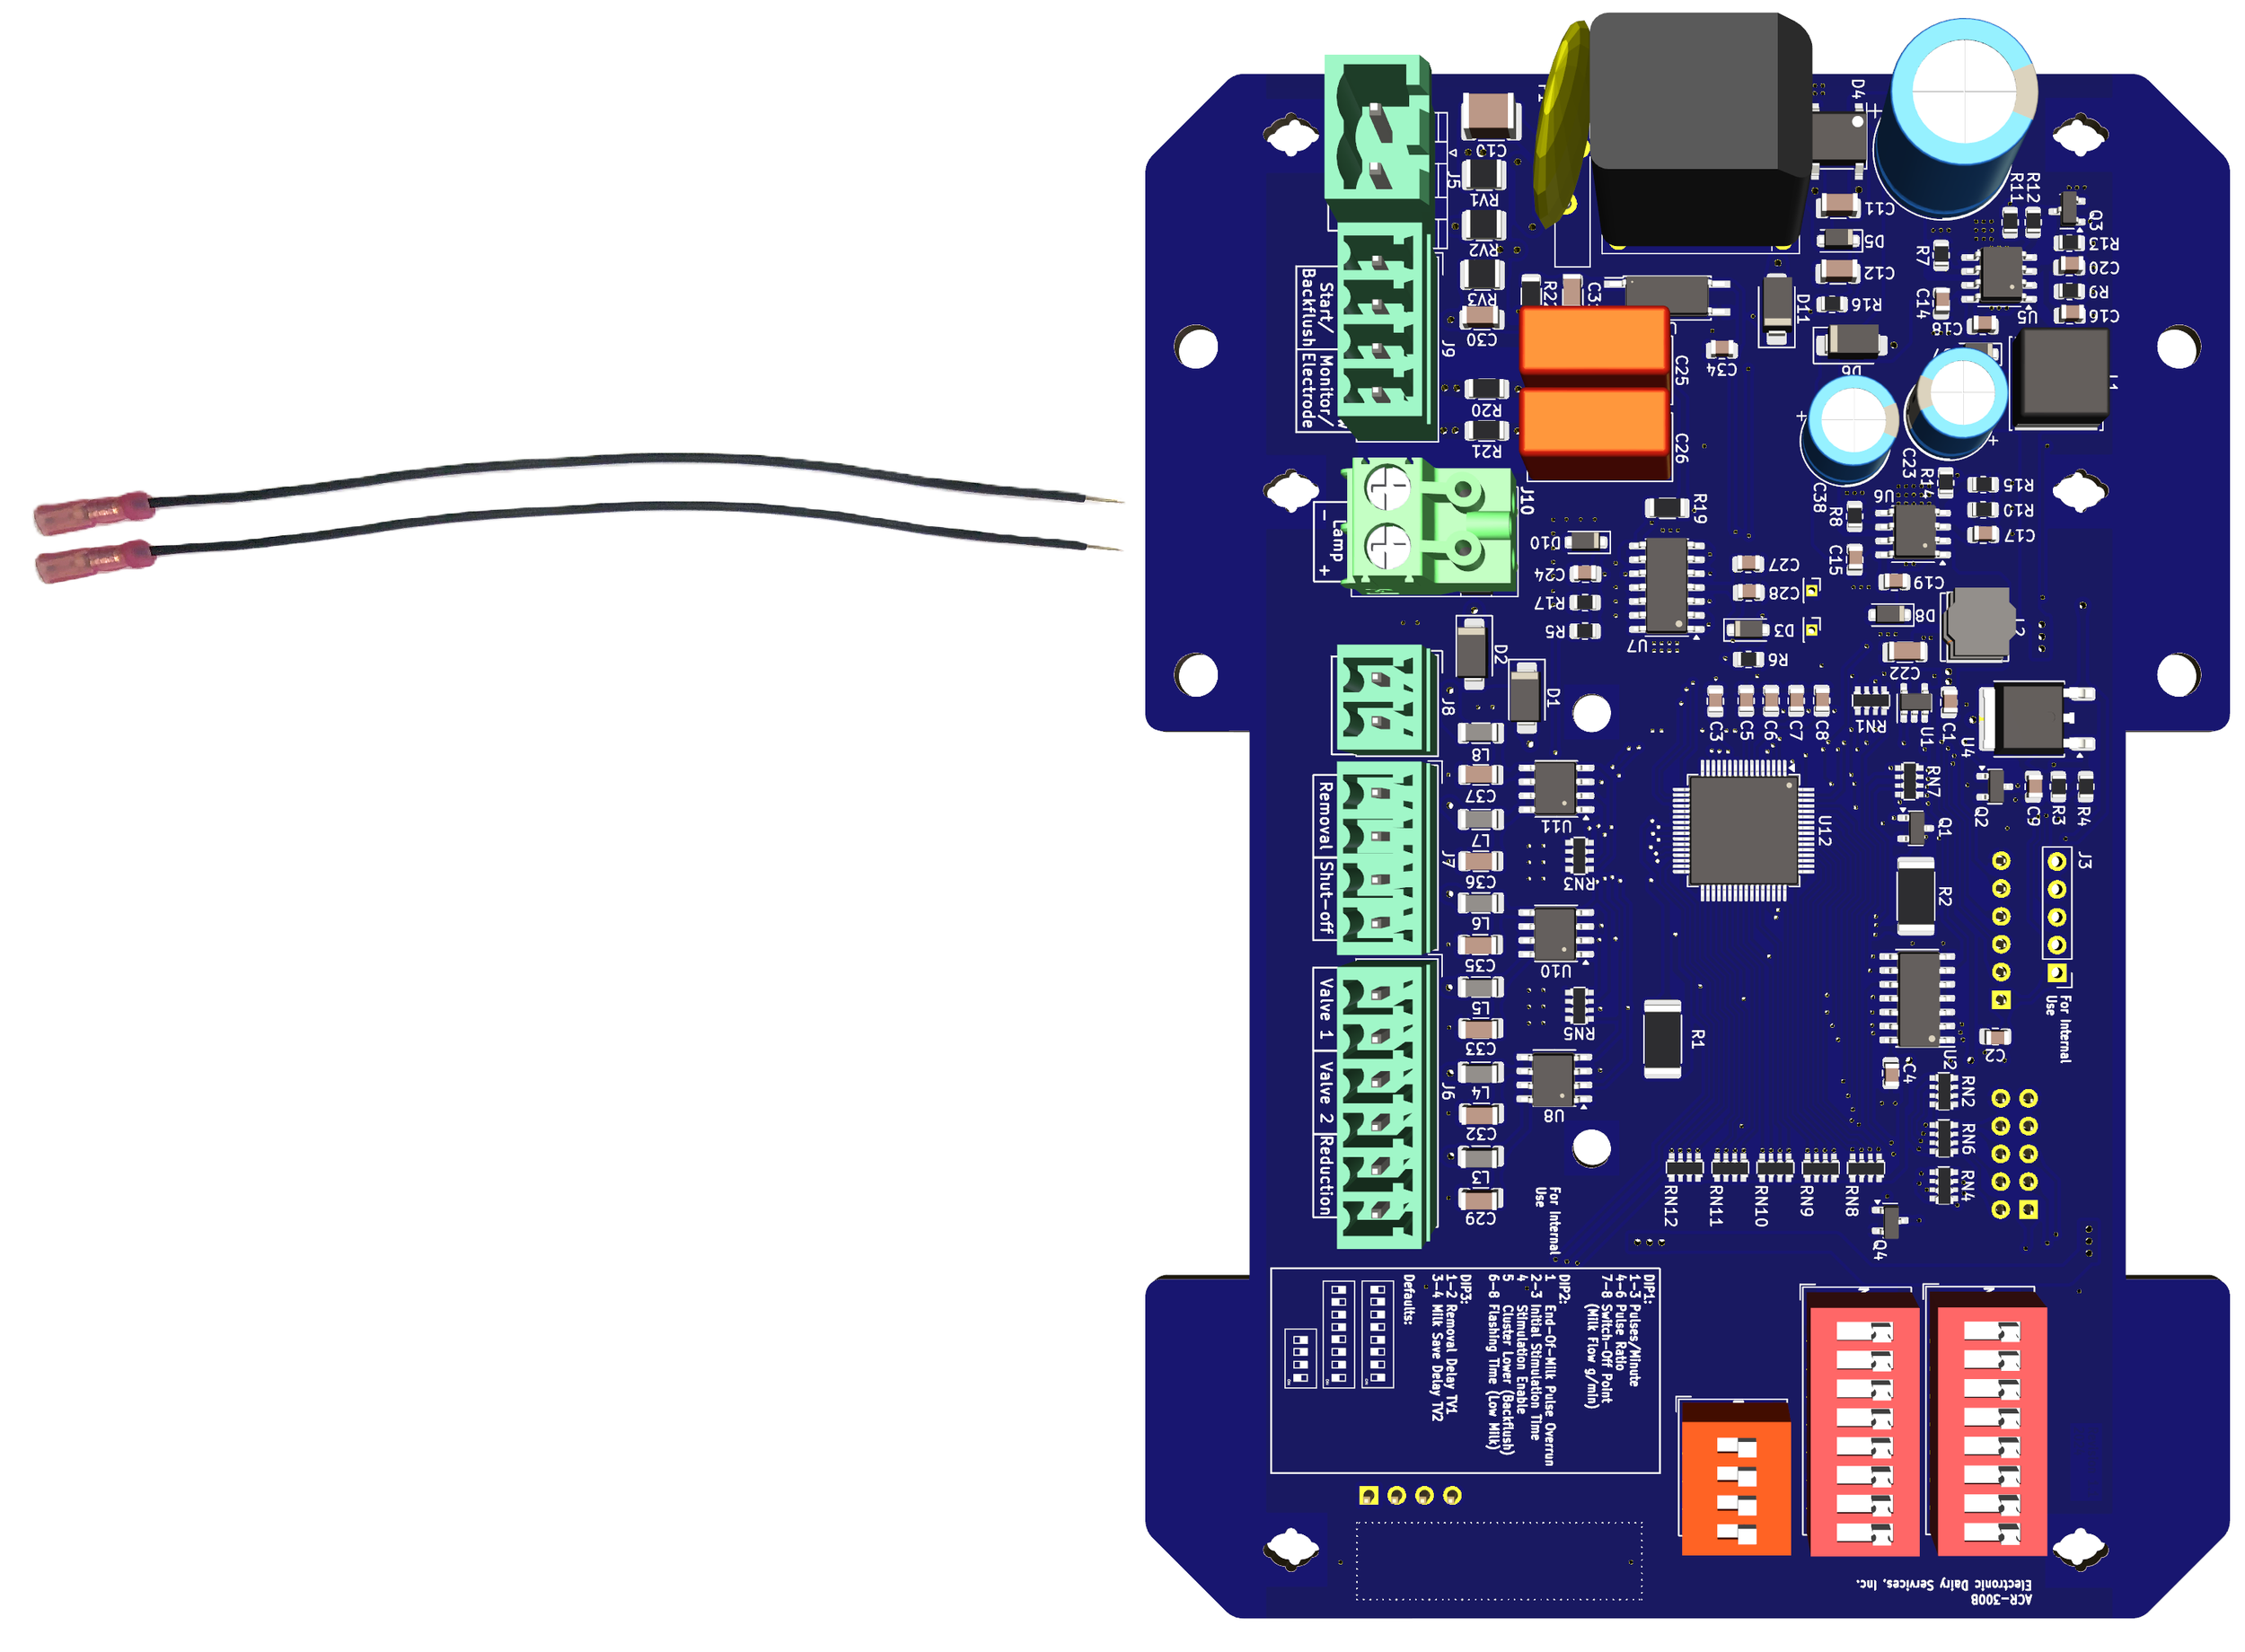
1. Install Terminal:
Press the terminal block plug onto the pin header.
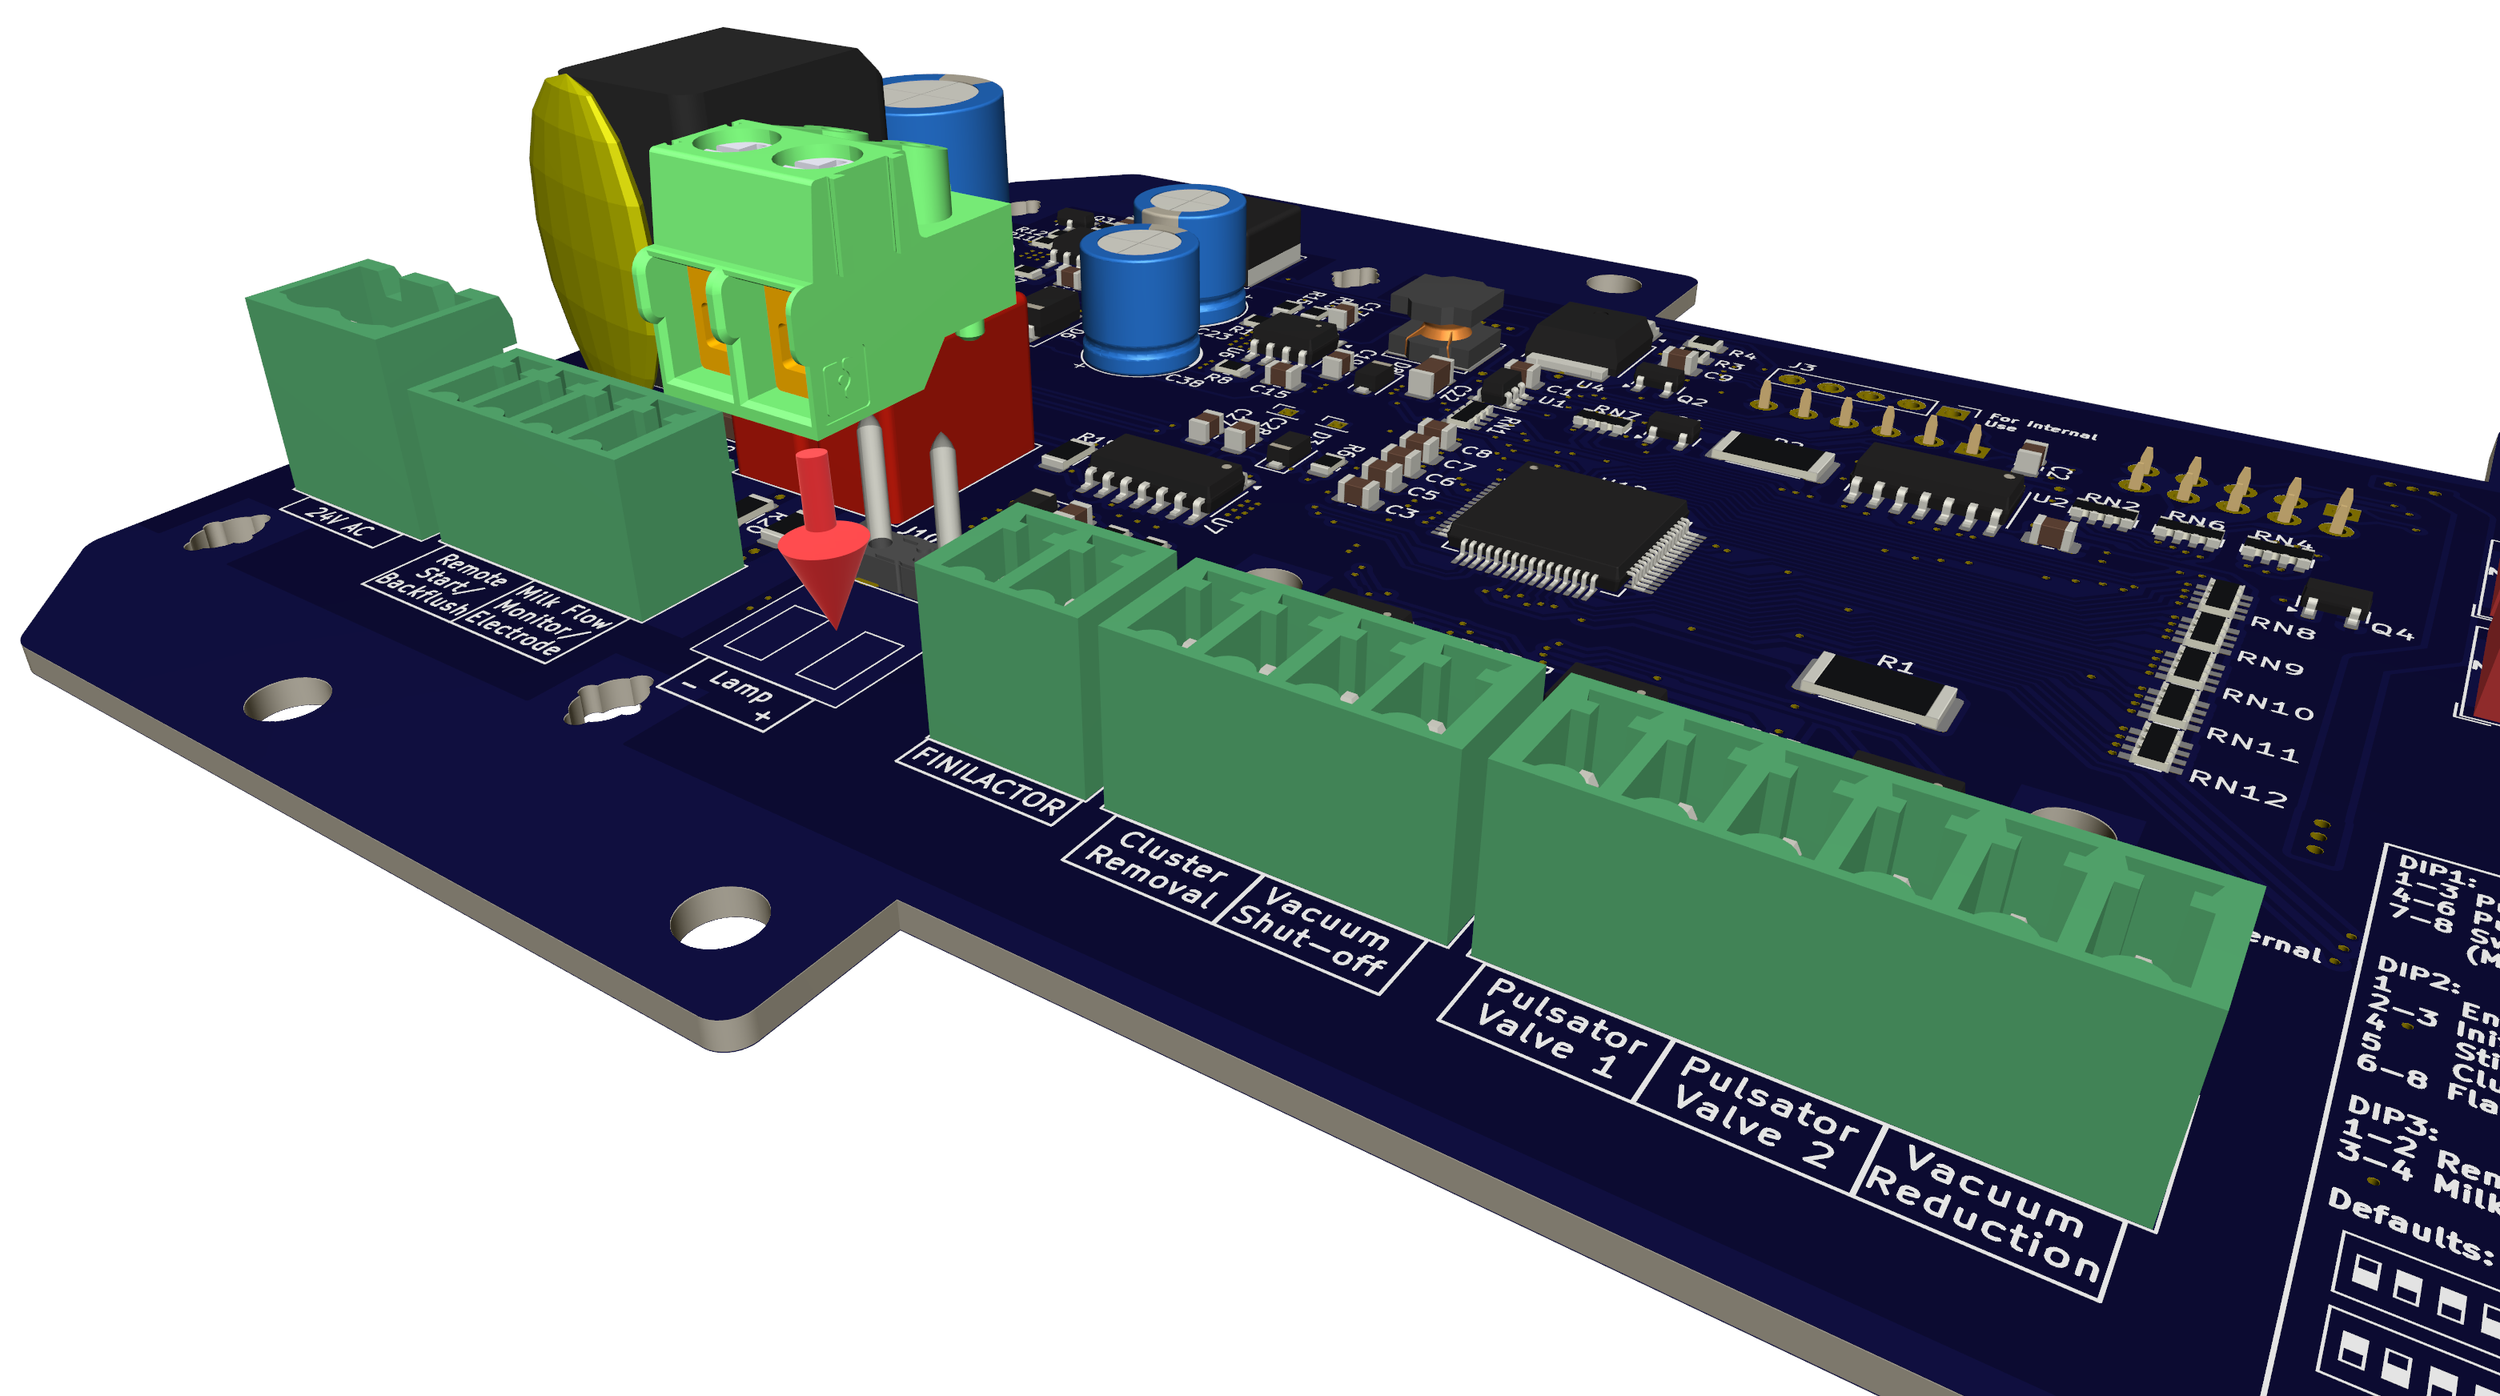
Attach the two supplied wires to the terminal block.
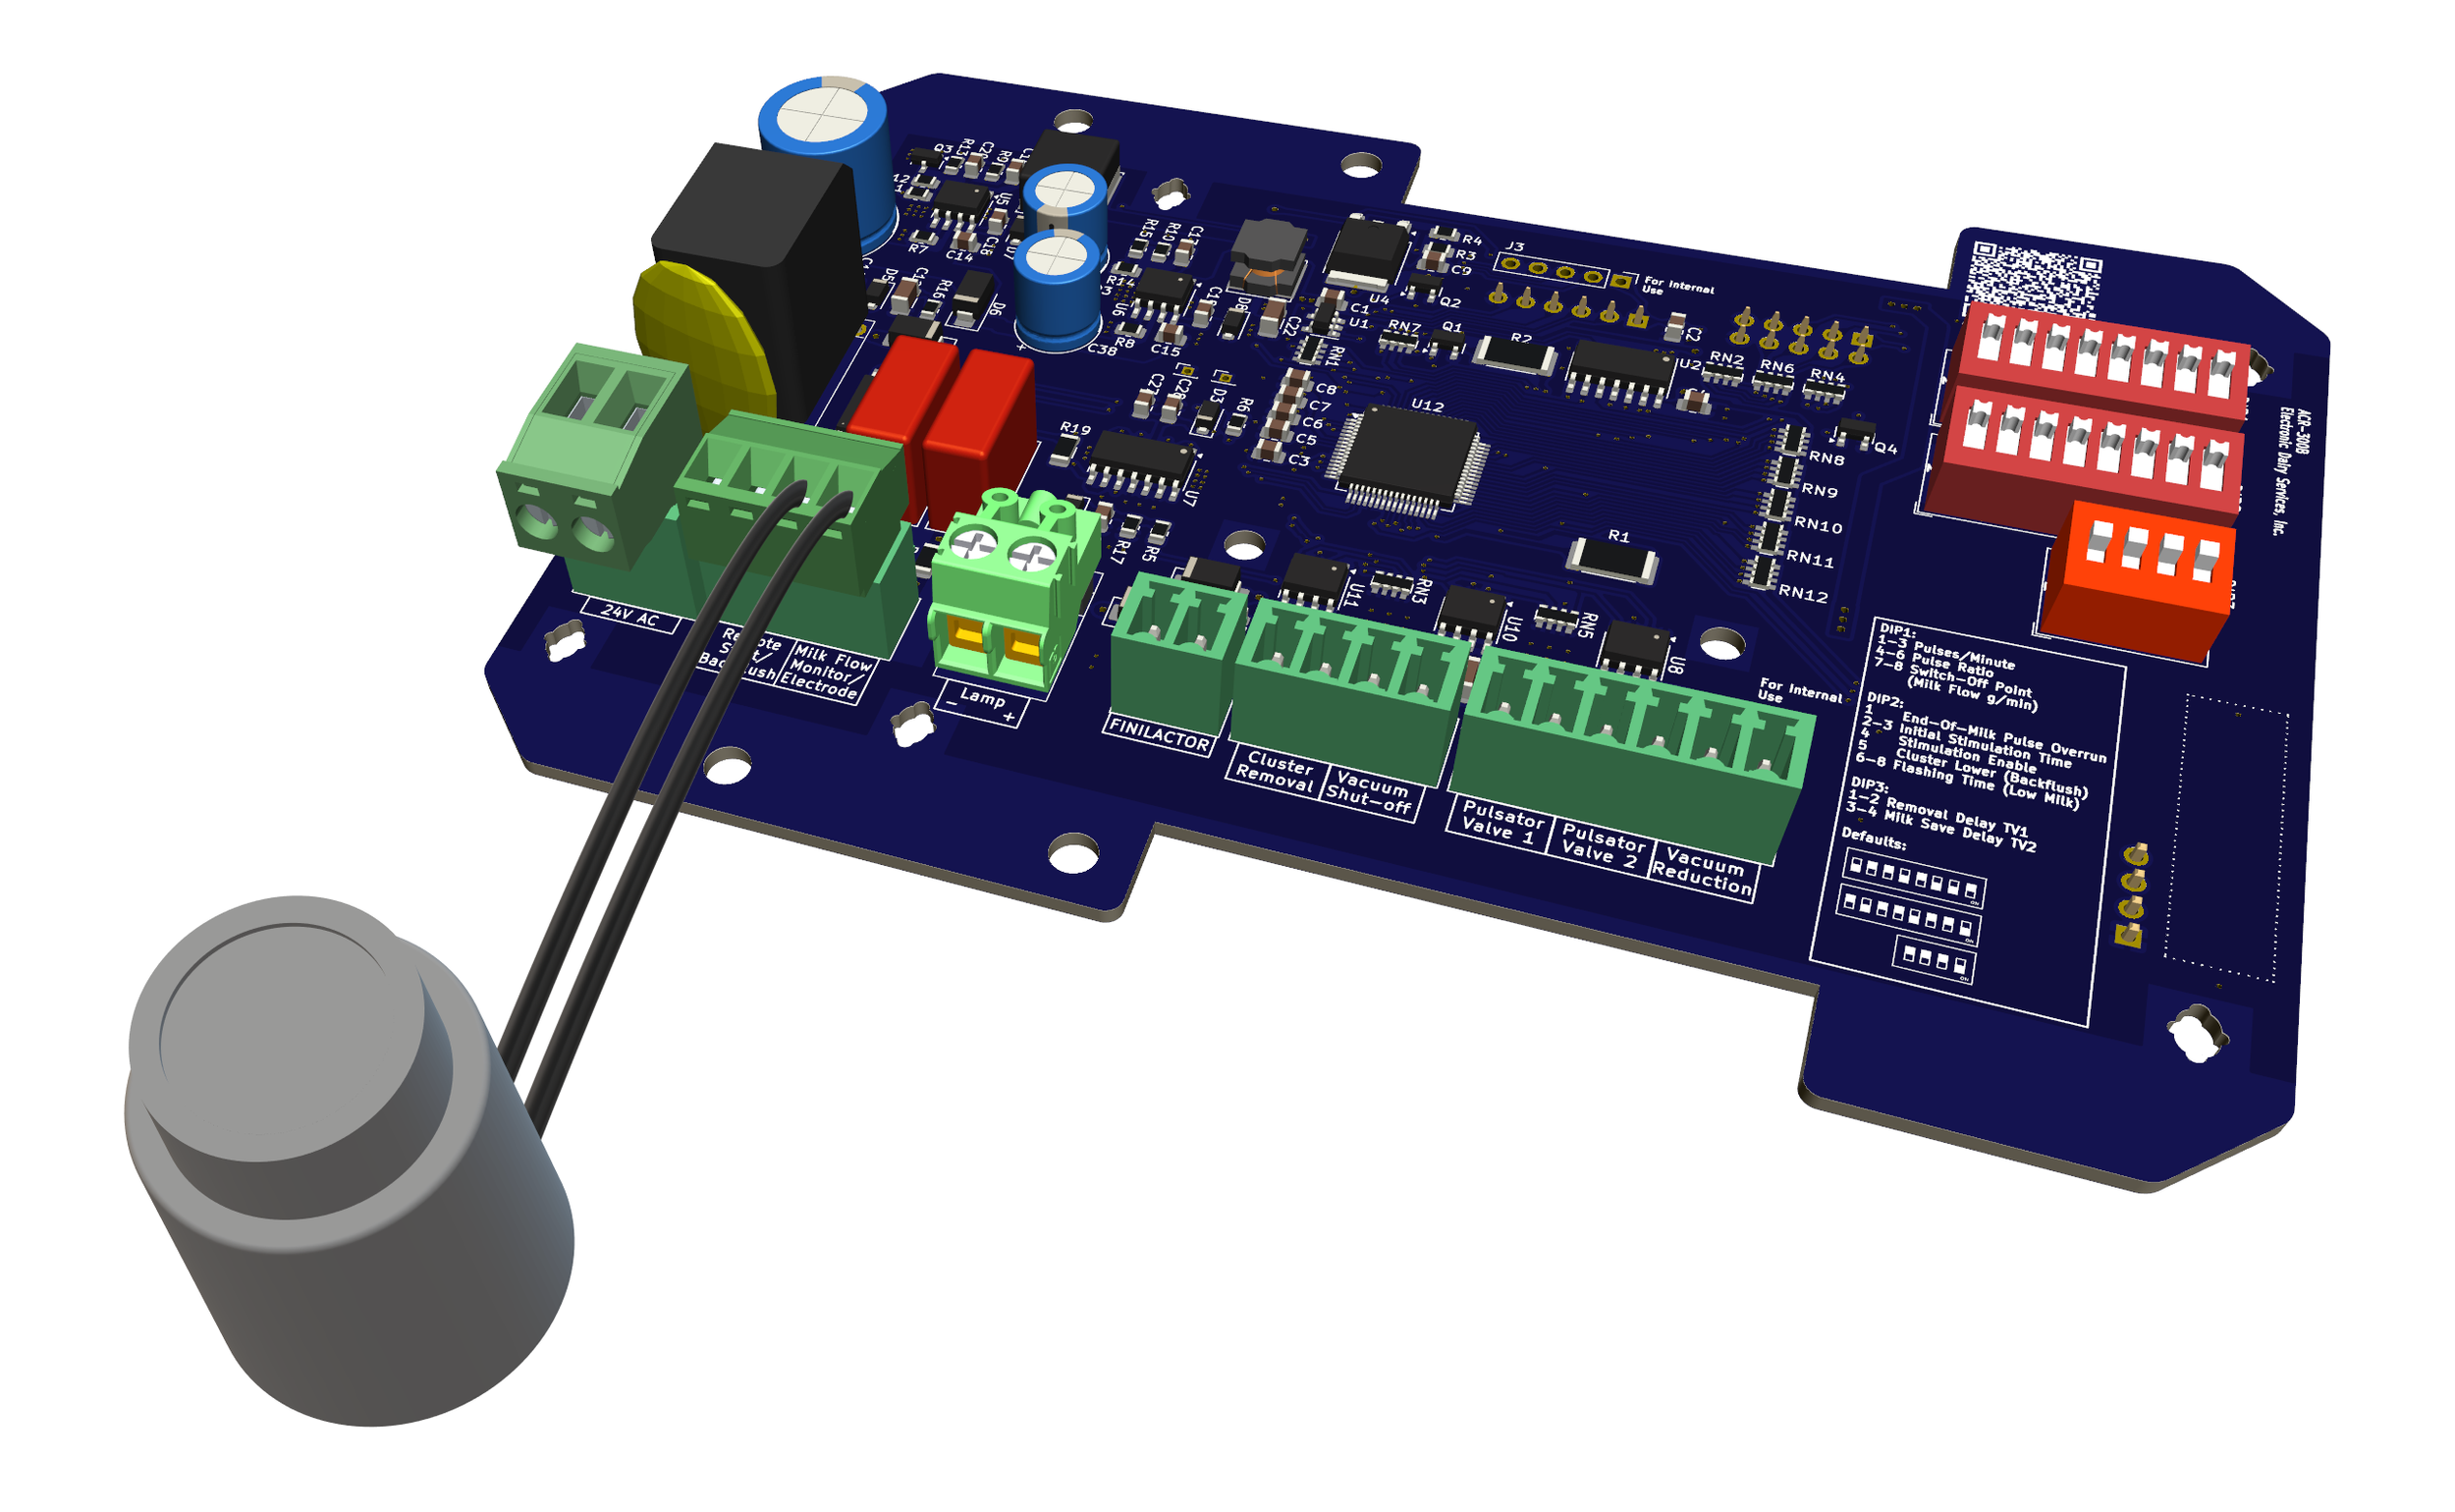
Attach all the other terminal blocks to their appropriate connector.
2. Attach wires:
3. Set the dip switches:
Set the DIP switches to match the original board.
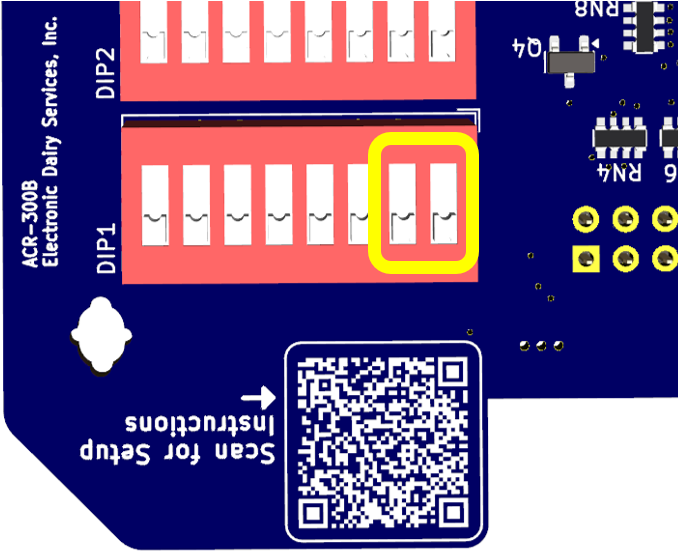
4. Milk flow monitoring:
DeMax CT Box
The compact DeMax CT box has additional setup. Click this link to access.

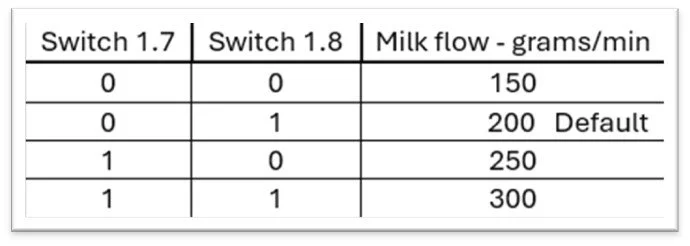
Normally, the electrode value should only be adjusted using DIP switches 7 and 8 of switch bank 1. (See Stats II book pages 25-26)
The default setting is 200 grams per minute.
Setting the switches to a higher number
causes the milking to be wetter.
Other settings
Resistance:
If the resistance must be changed, use the following procedure (Not normally needed):
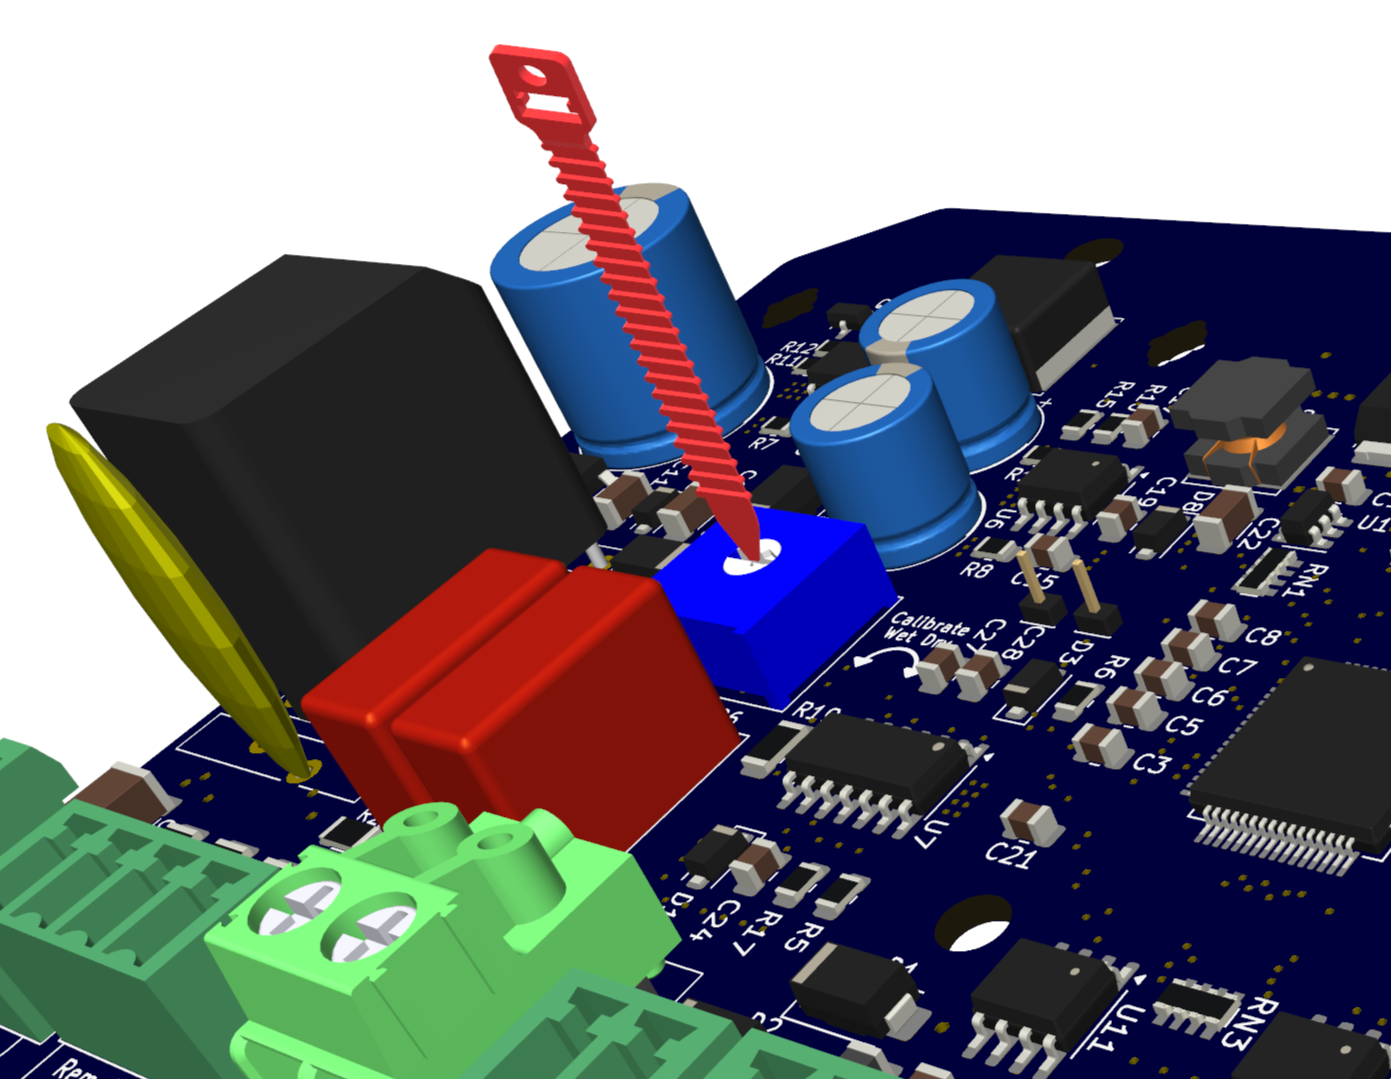
1. Using a test potentiometer, set to the desired resistance, attach its leads between the Milk Flow pins (J9 terminal, pins 3 and 4). Suggested values based upon GEA® Instruction Manual 7053-9001-019 (or STATS II book page 26) are:
VisoFlow: 460Ω (Default)
Legacy: 220Ω
2. Disable Power
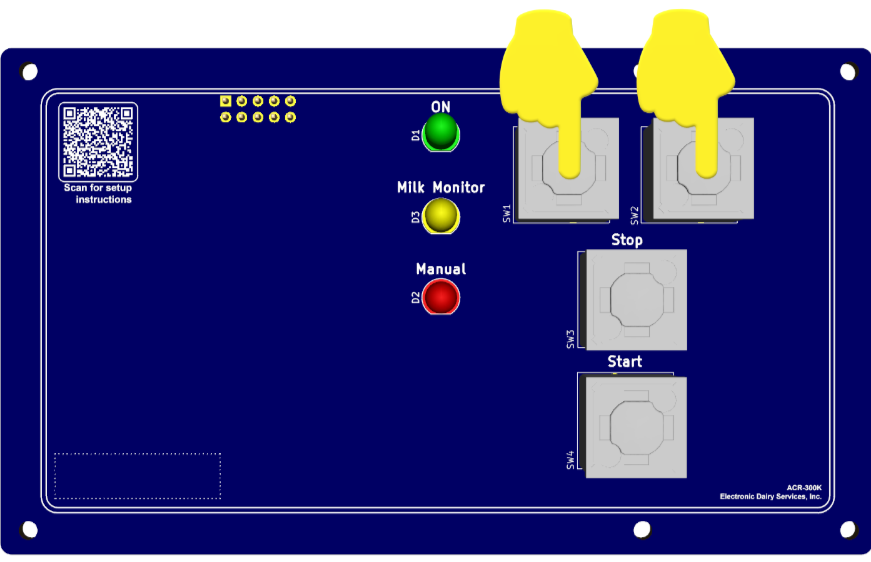
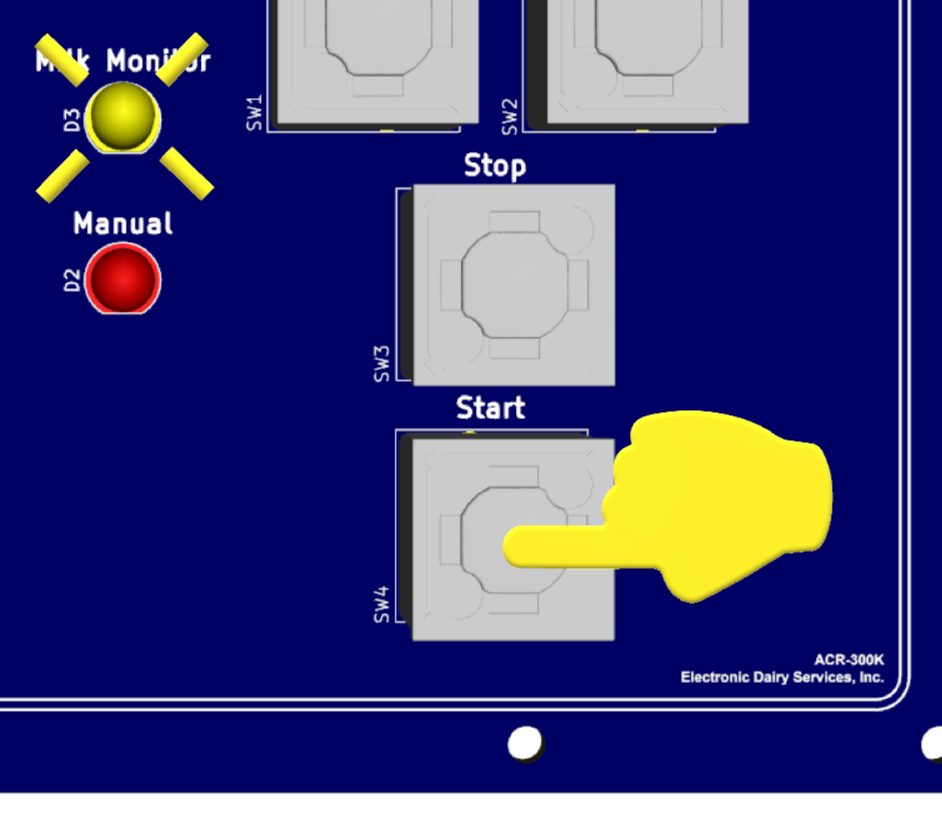
3. While holding the “Start” button apply power then release the start key.
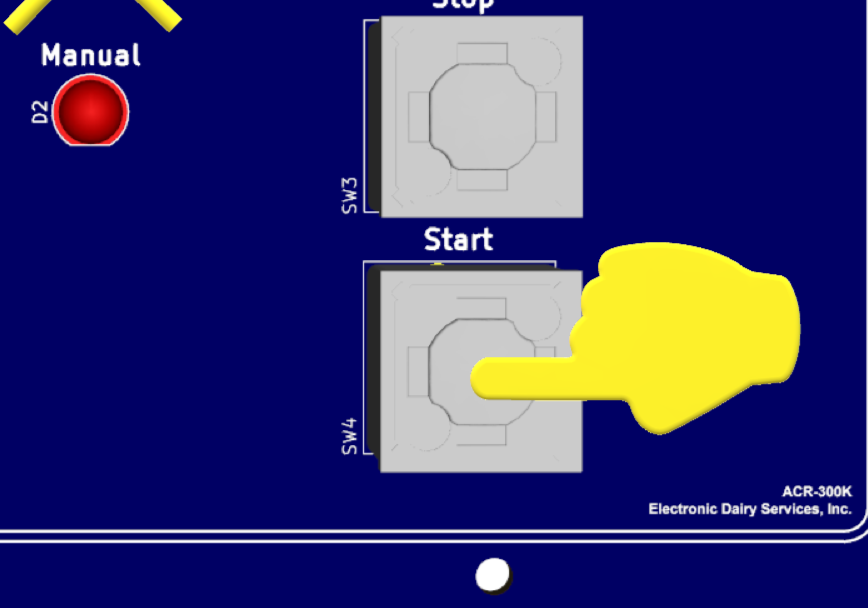
4. If all three LED’s are lit, the value is already set and no calibration is needed.

5. If the value is not set, using a small flat screwdriver, adjust the potentiometer RV4 until all three LEDs are lit.
6. Pressing the stop key or cycling the power off and on will release the board from the calibration mode.
7. Calibration procedure completed.
If the claw is coming off before milk is sensed, the bridging time (initial delay) can be increased beyond factory maximum settings (i.e. settings with the DIP switch). For cows it can be increased by 30 seconds, for goats 10 seconds. Please note that this feature is exclusive to the ACR-300 and is not available on the GEA® ACR-3. (Software version 1.005 and newer) To set this feature:
Extended Bridging Time:
1. Disable power
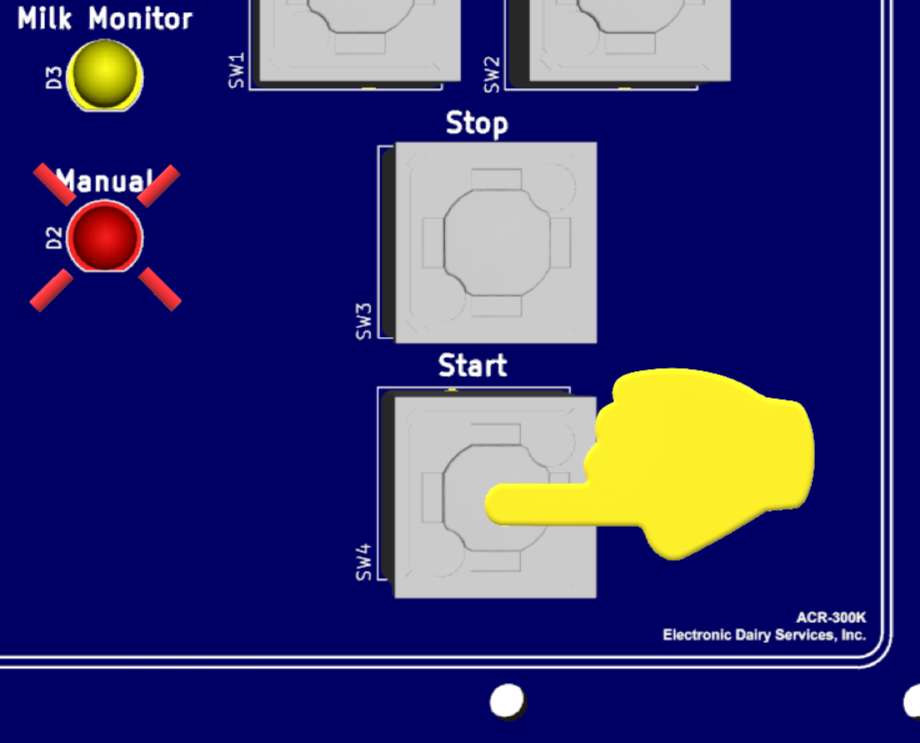
2. While holding “RS” and “C” buttons down, enable power. Release the “RS” and “C” Keys
3. Press and release the “Start” key to toggle between extended time or normal time.
Extended time: Yellow LED will flash 1 time/second
Normal time: Red LED will flash 1 time/second (Default)
4. Procedure is complete. Power-Cycle the device or press the “C” key to exit the calibration mode.